The stars, despite many being larger and brighter than our own Sun, are very, very far away. Thus, their apparent brightness is significantly less than the ball of nuclear fusion some 8 light-minutes away. Which means that while the local sky-orb is not as bright in absolute terms, it tends to dominate the sky when it is above the horizon. So much so, that the time called ‘astronomical twilight’ starts while the sun is some 18° below the horizon, and is noted because there is a visible change in the amount of sky brightness to the east at this time each day.
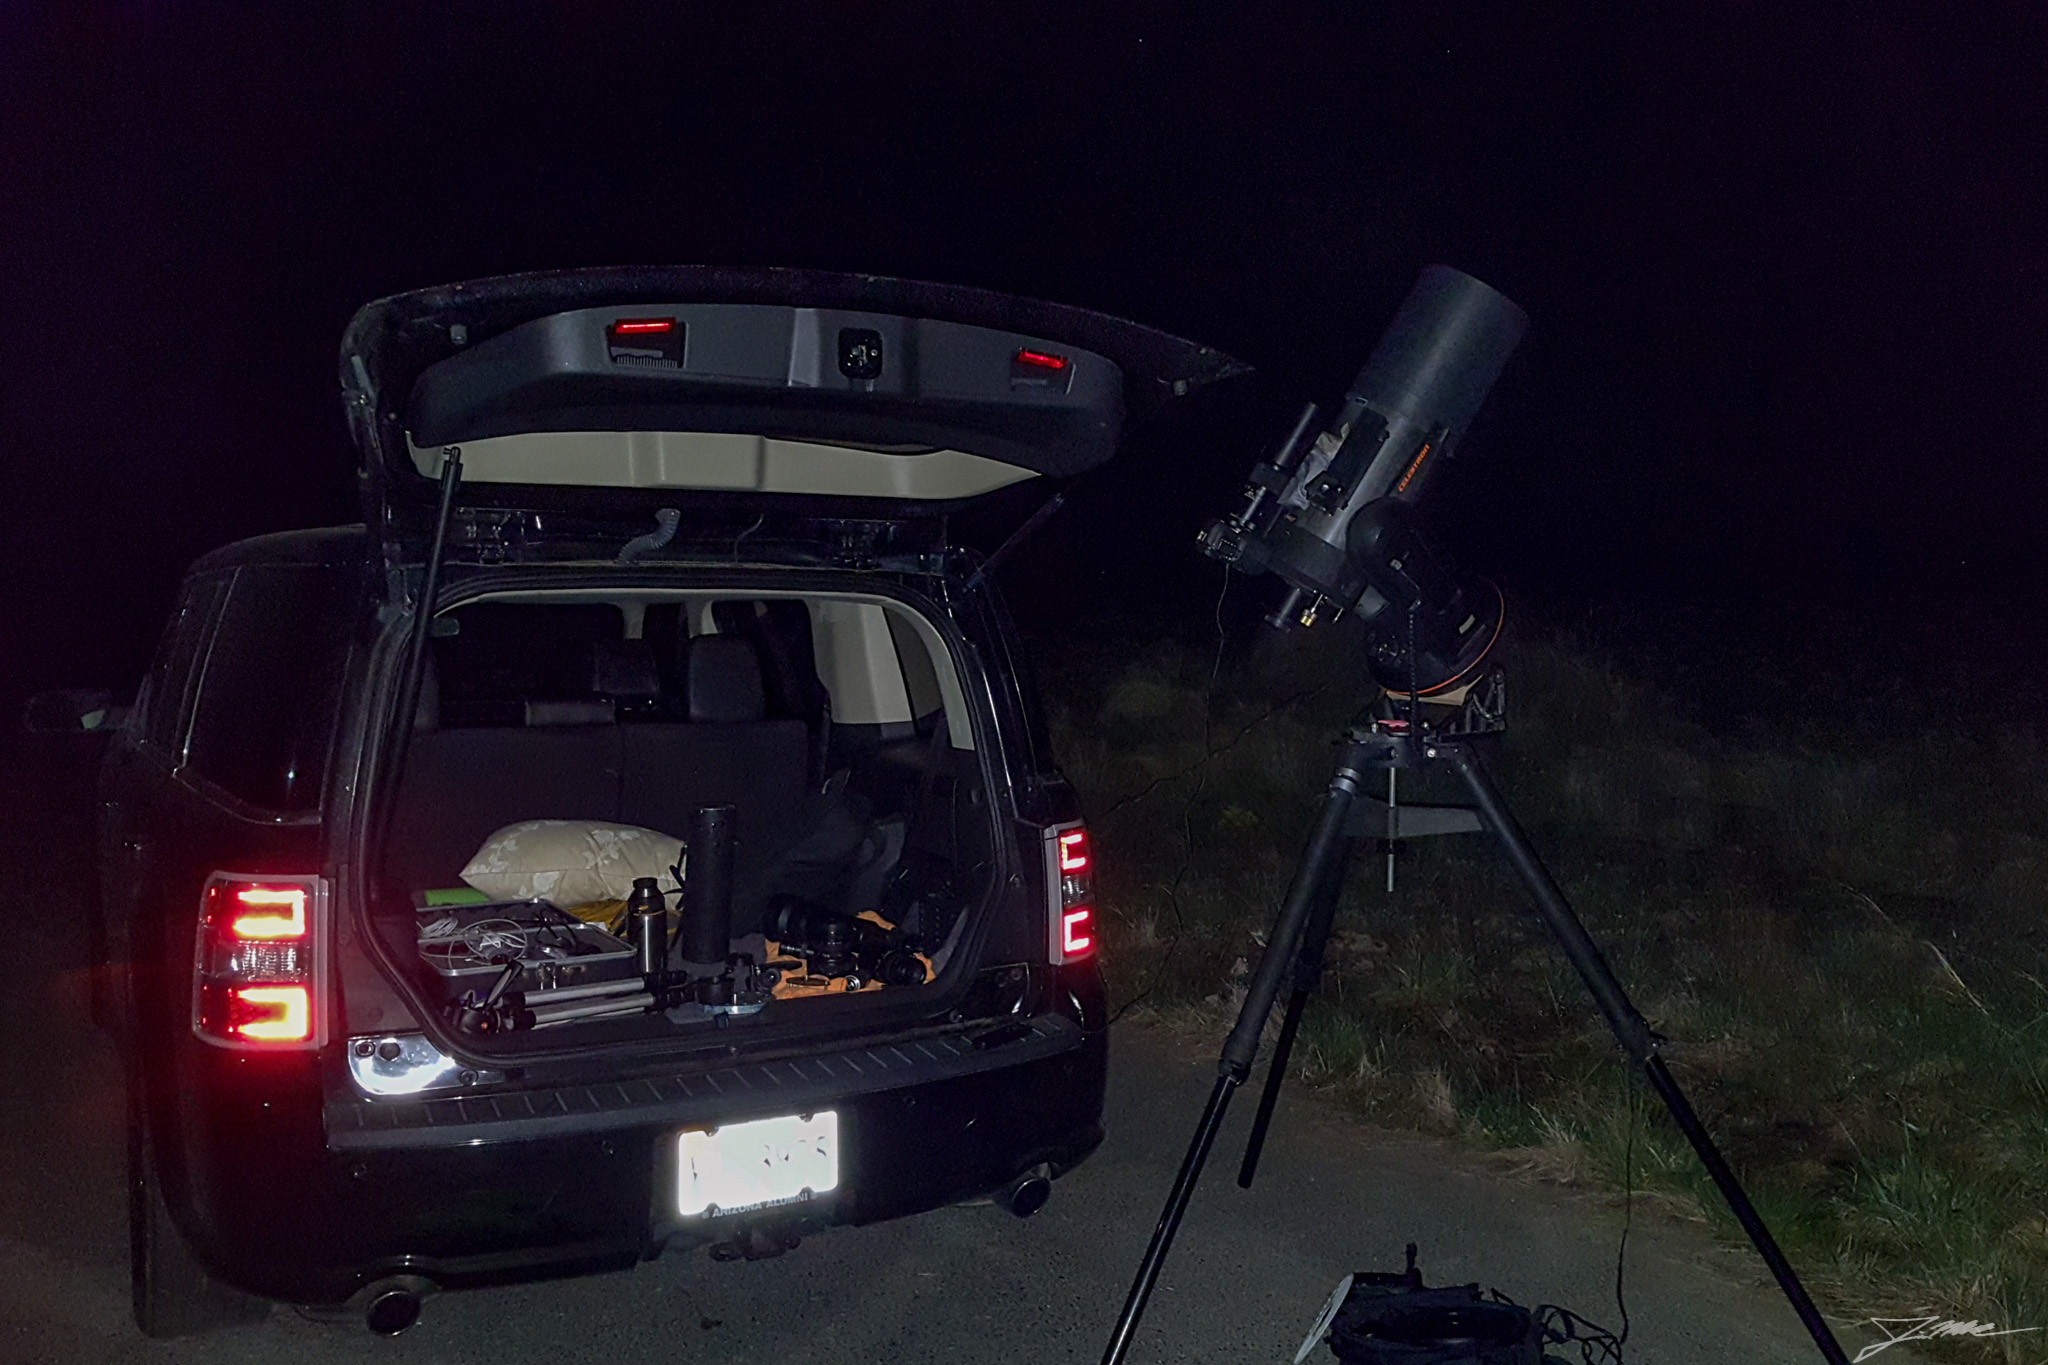
The long and the short of all that is that in order to have any luck taking astrophotos, one must be willing to be up at night, or invest a significant chunk of change into automated gear that will shoot while you’re asleep. The location here isn’t conducive to setting up anything permanent, due to the number of trees about. I find myself having to shuffle the scope around to different sections of the yard on different nights in order to see the appropriate portion of the sky through the gap in the trees. Thus, I have been ever in search of a better location to set up and shoot late at night. Marine Corps Base Quantico has some parking lots and outbuildings which are both adjacent to the Potomac (large swath of un-populated area to the east and southeast to limit light pollution), and South of the Quantico airfield (again, to be able to shoot to the south without the lights of the airfield). It’s a nice spot on the edge of some pavement, so I can just pull the car up, unload, and set up:
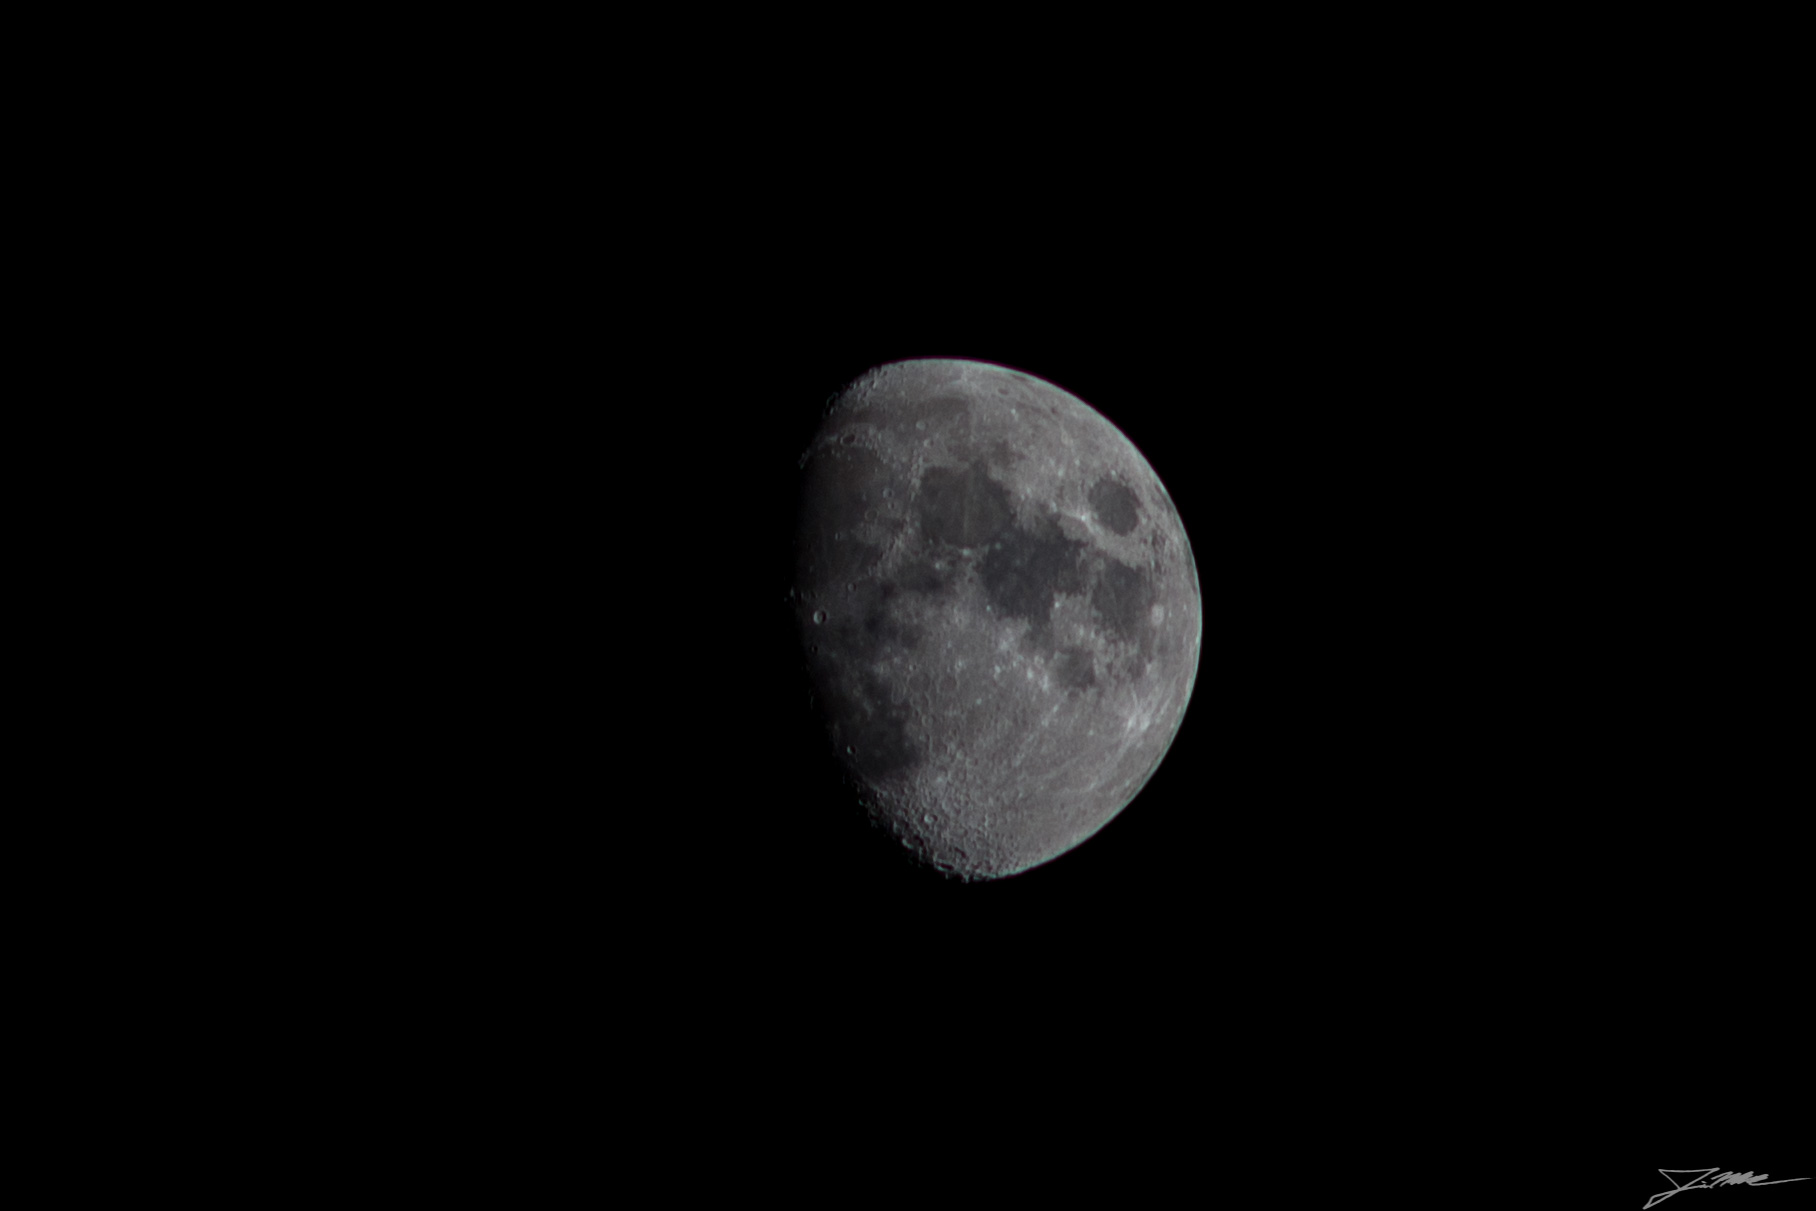
Since J.J. is currently still chilling in the NICU, I took the opportunity to spend a clear night outside under the stars. Or at least I stayed out until I ran out of coffee, some time around 0300. The moon was just past 50% illuminated, so I knew I wouldn’t have great luck with many nebulas or galaxies, but thought I could try and grab some globular clusters (collections of stars that look like little ‘starbursts’). Since I was having to shoot under less-than-perfect lunar phase conditions, I figured I’d start by shooting the moon:
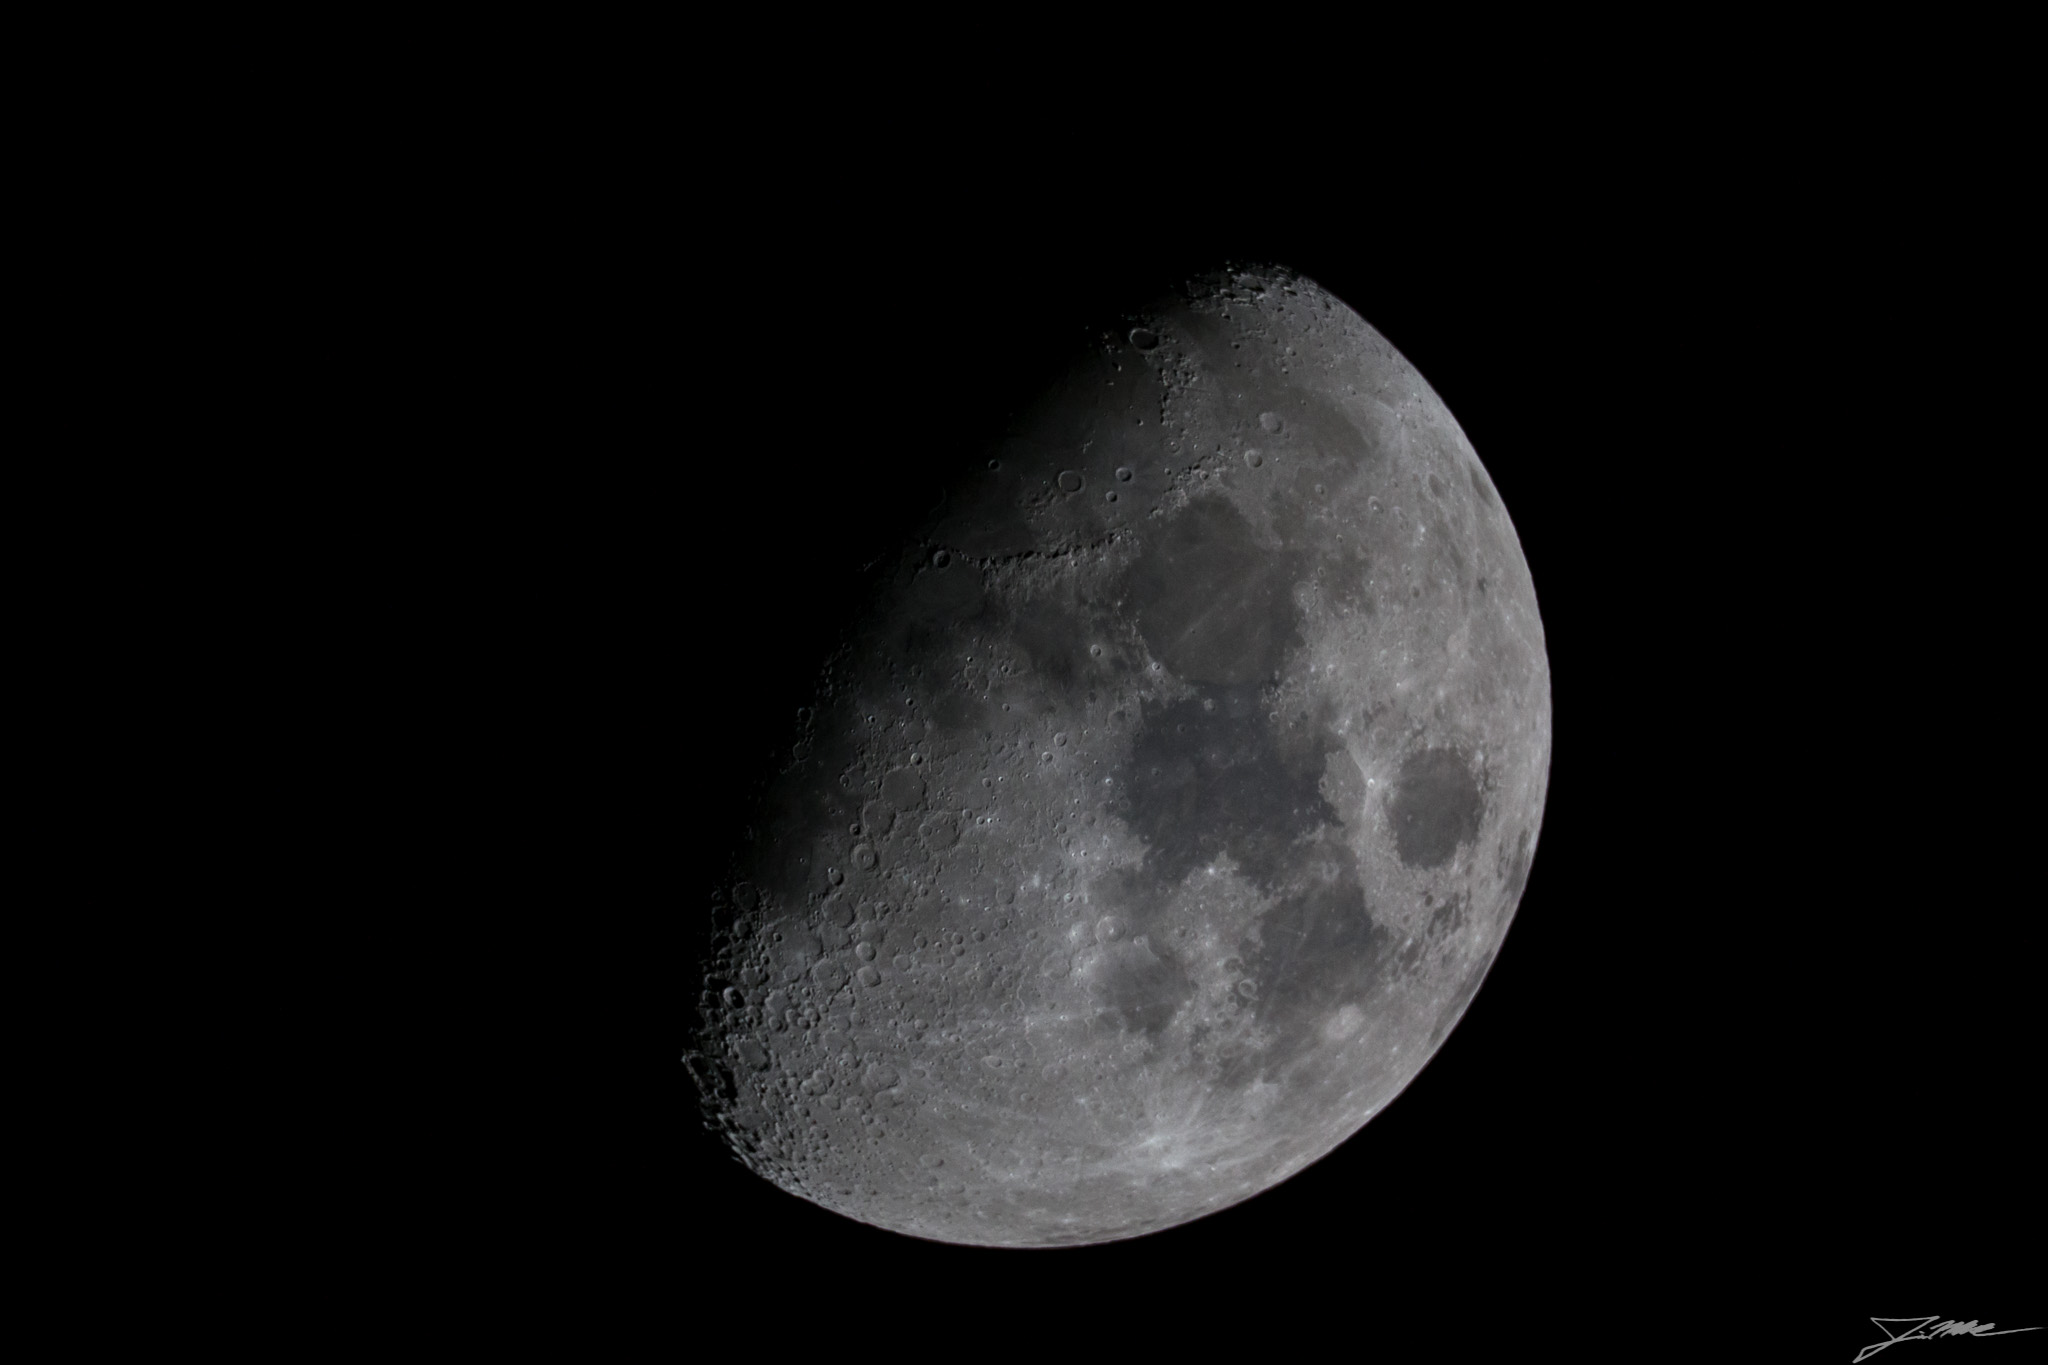
As an aside, I still need to order a full-width 2″ EOS eyepiece adapter, since I screwed up and put one that necks down to a T-fitting on my Christmas list, and got it. This wasn’t an issue until I upgraded to the full-frame 6D, and isn’t apparent at all in this shot, but for sky shots, the vignetting is more significant than it should be. Not sure if it will make the shots with the focal reducer in place any better, but it sure can’t hurt.
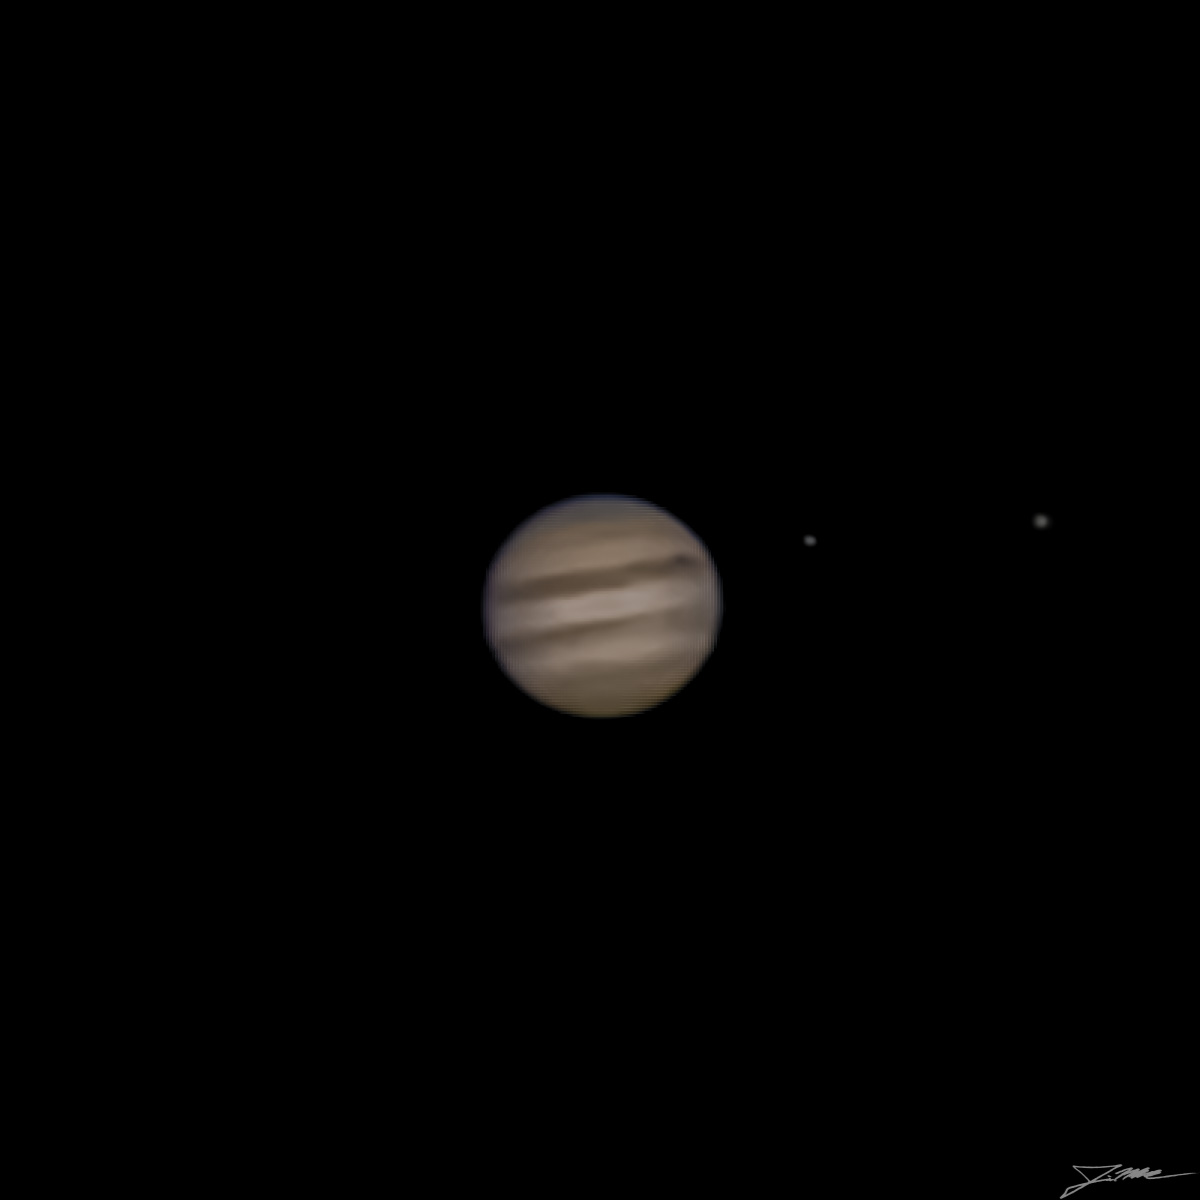
Moving on… Sky brightness was high due to the moon being out, so I moved from the moon to other very bright objects, namely the planets. Jupiter did not disappoint, though I ran into the ‘good transparency, bad seeing’ brick wall I’ve been cursed with every time I’ve tried to shoot the planets recently. Oh well, I still managed to capture 2 moons and one shadow. This shot was the best 400 frames of a 1,200 frame video, stacked in AVIStack2 and wavelet processed in Registax. The Great Red Spot was just at the right-hand edge of the planet, and due to the air not being very still, it didn’t resolve well / nearly at all:
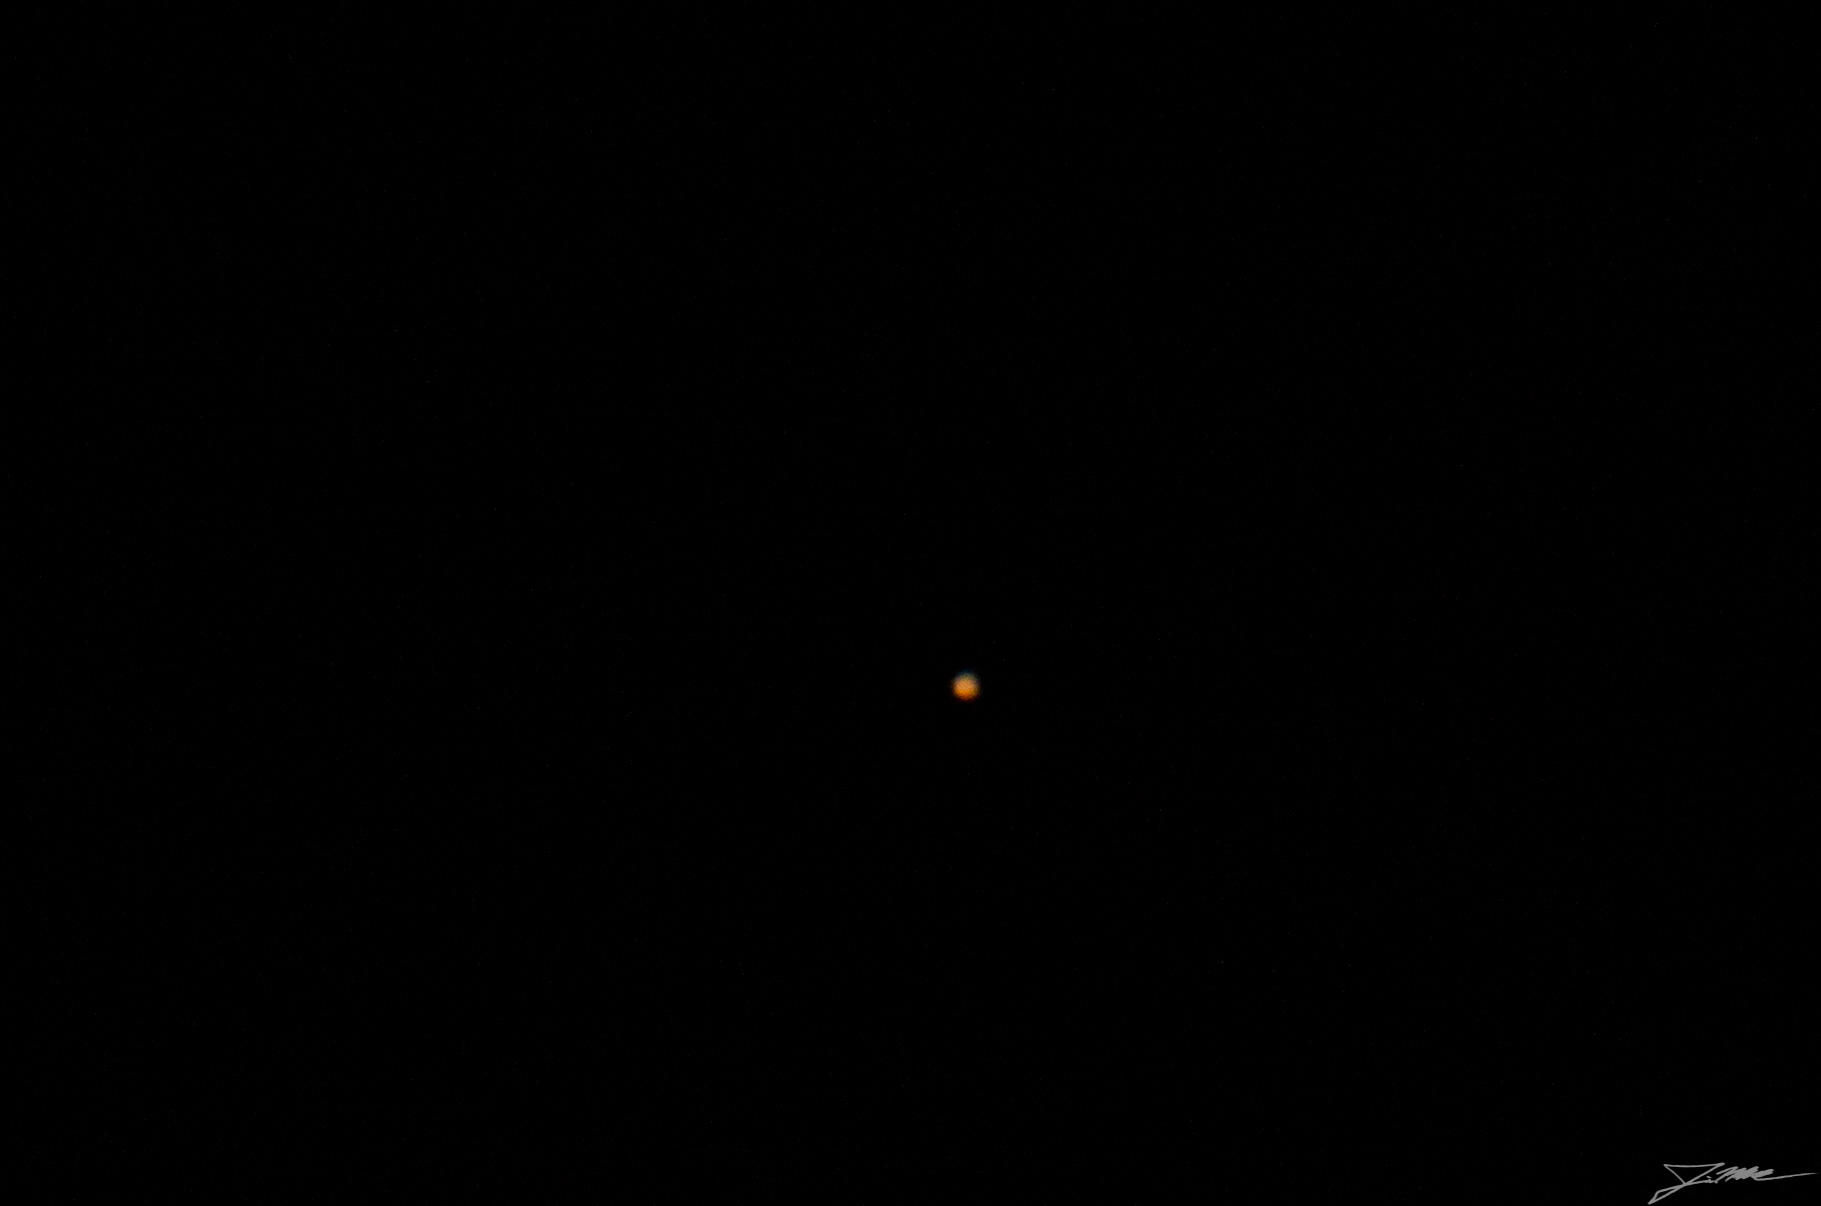
Mars showed up nicely, and despite being very small for this imaging setup (NexStar 8 GPS with 2x barlow lens for a focal length of 4064mm, and a Canon 6D with MUCH bigger pixels than would be recommended for planetary work at that FL), I still managed to capture a bit of color change on the northern portion of the planet. Since shooting video for this target would lump even more pixels together, I tried a series of single frame shots, of which this one was the best. Shot specs ended up at 4064mm, f/20, ISO 3,200, 1/1000s. Not quite ‘Here’s a nice shot of Mars with its polar cap’, it’s a shot of Mars which is lighter on the northern end where the polar cap lives…
Saturn was a complete mess, since it was too close to the horizon to be above the worst of the air currents. Not even going to bother posting the single frames I tried, since they were simply abysmal. At this point in the night, I wanted to start grabbing Messier objects, specifically star clusters, since those aren’t affected by skyglow the same way that nebulas are. Because they are closely grouped collections of individual stars, they still show up against a slightly brighter background. I knew the Beehive Cluster in Cancer would be visible, so I punched M44 into the scope and got to imaging:
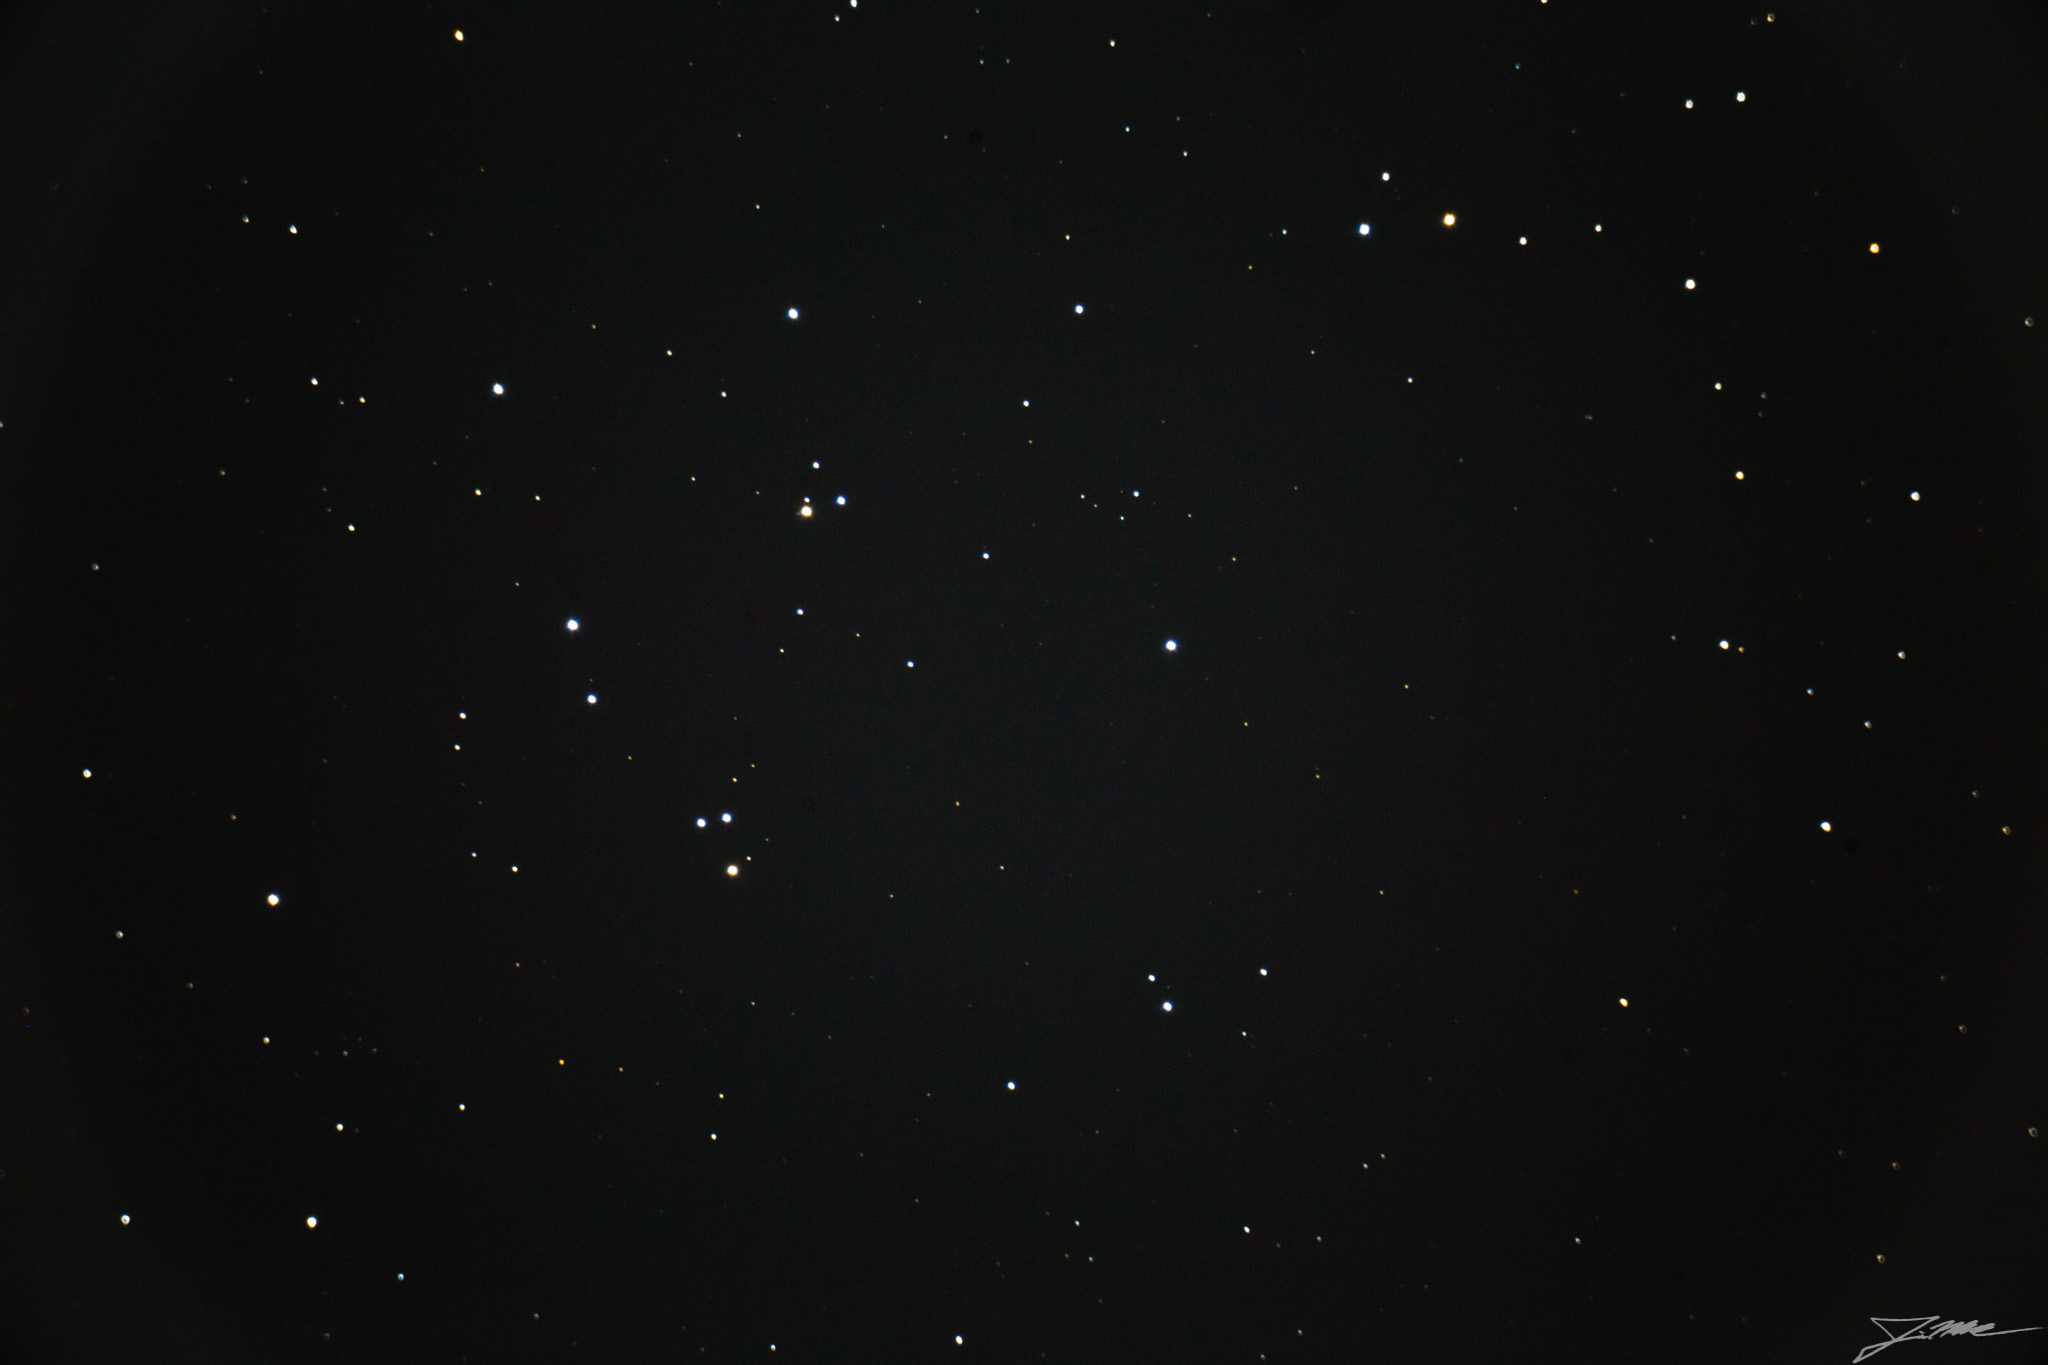
This is not a complete shot of this very open cluster, but as a bulb shutter shot of 38 seconds (using a remote trigger), I was happy with it not having star trails. While the Celestron SkyPortal app is pretty efficient for getting one’s bearings and grabbing star names for aligning the scope, it fails pretty miserably when trying to see which deep-sky objects are visible. Thankfully I had enough cellphone signal to download the Stellarium Mobile app, which is MUCH better for this purpose. I knew a bunch of stuff would be coming up over the Eastern horizon as the night wore on, but wanted to see what was available across the rest of the sky in the meantime. After determining that 10-20 second exposures were plenty to get these clusters, I switched to a camera-timed exposure, and the hunt was off.
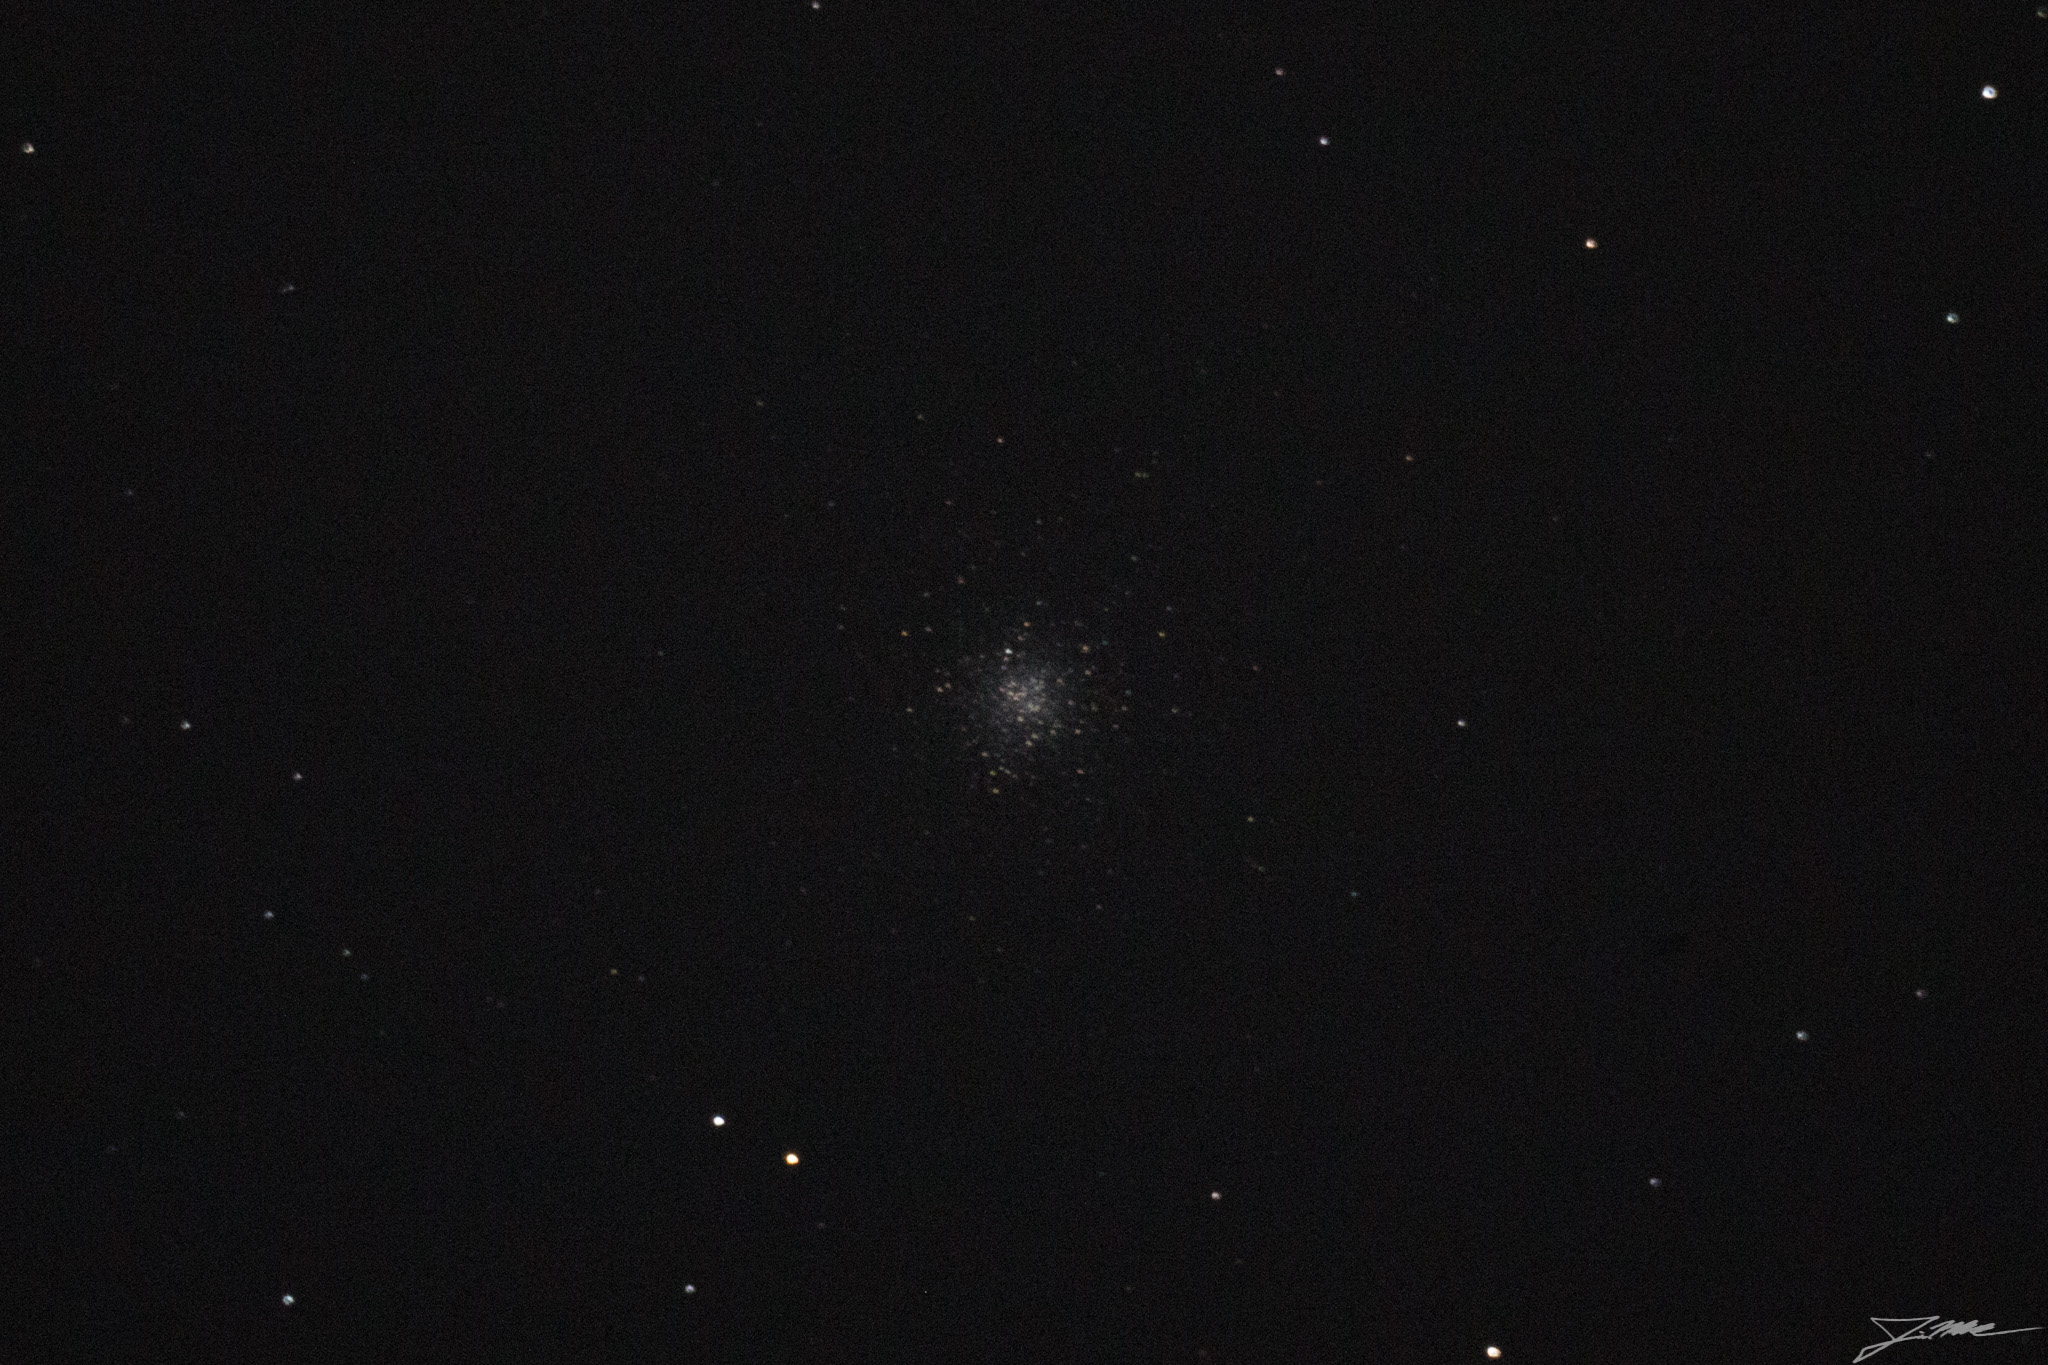
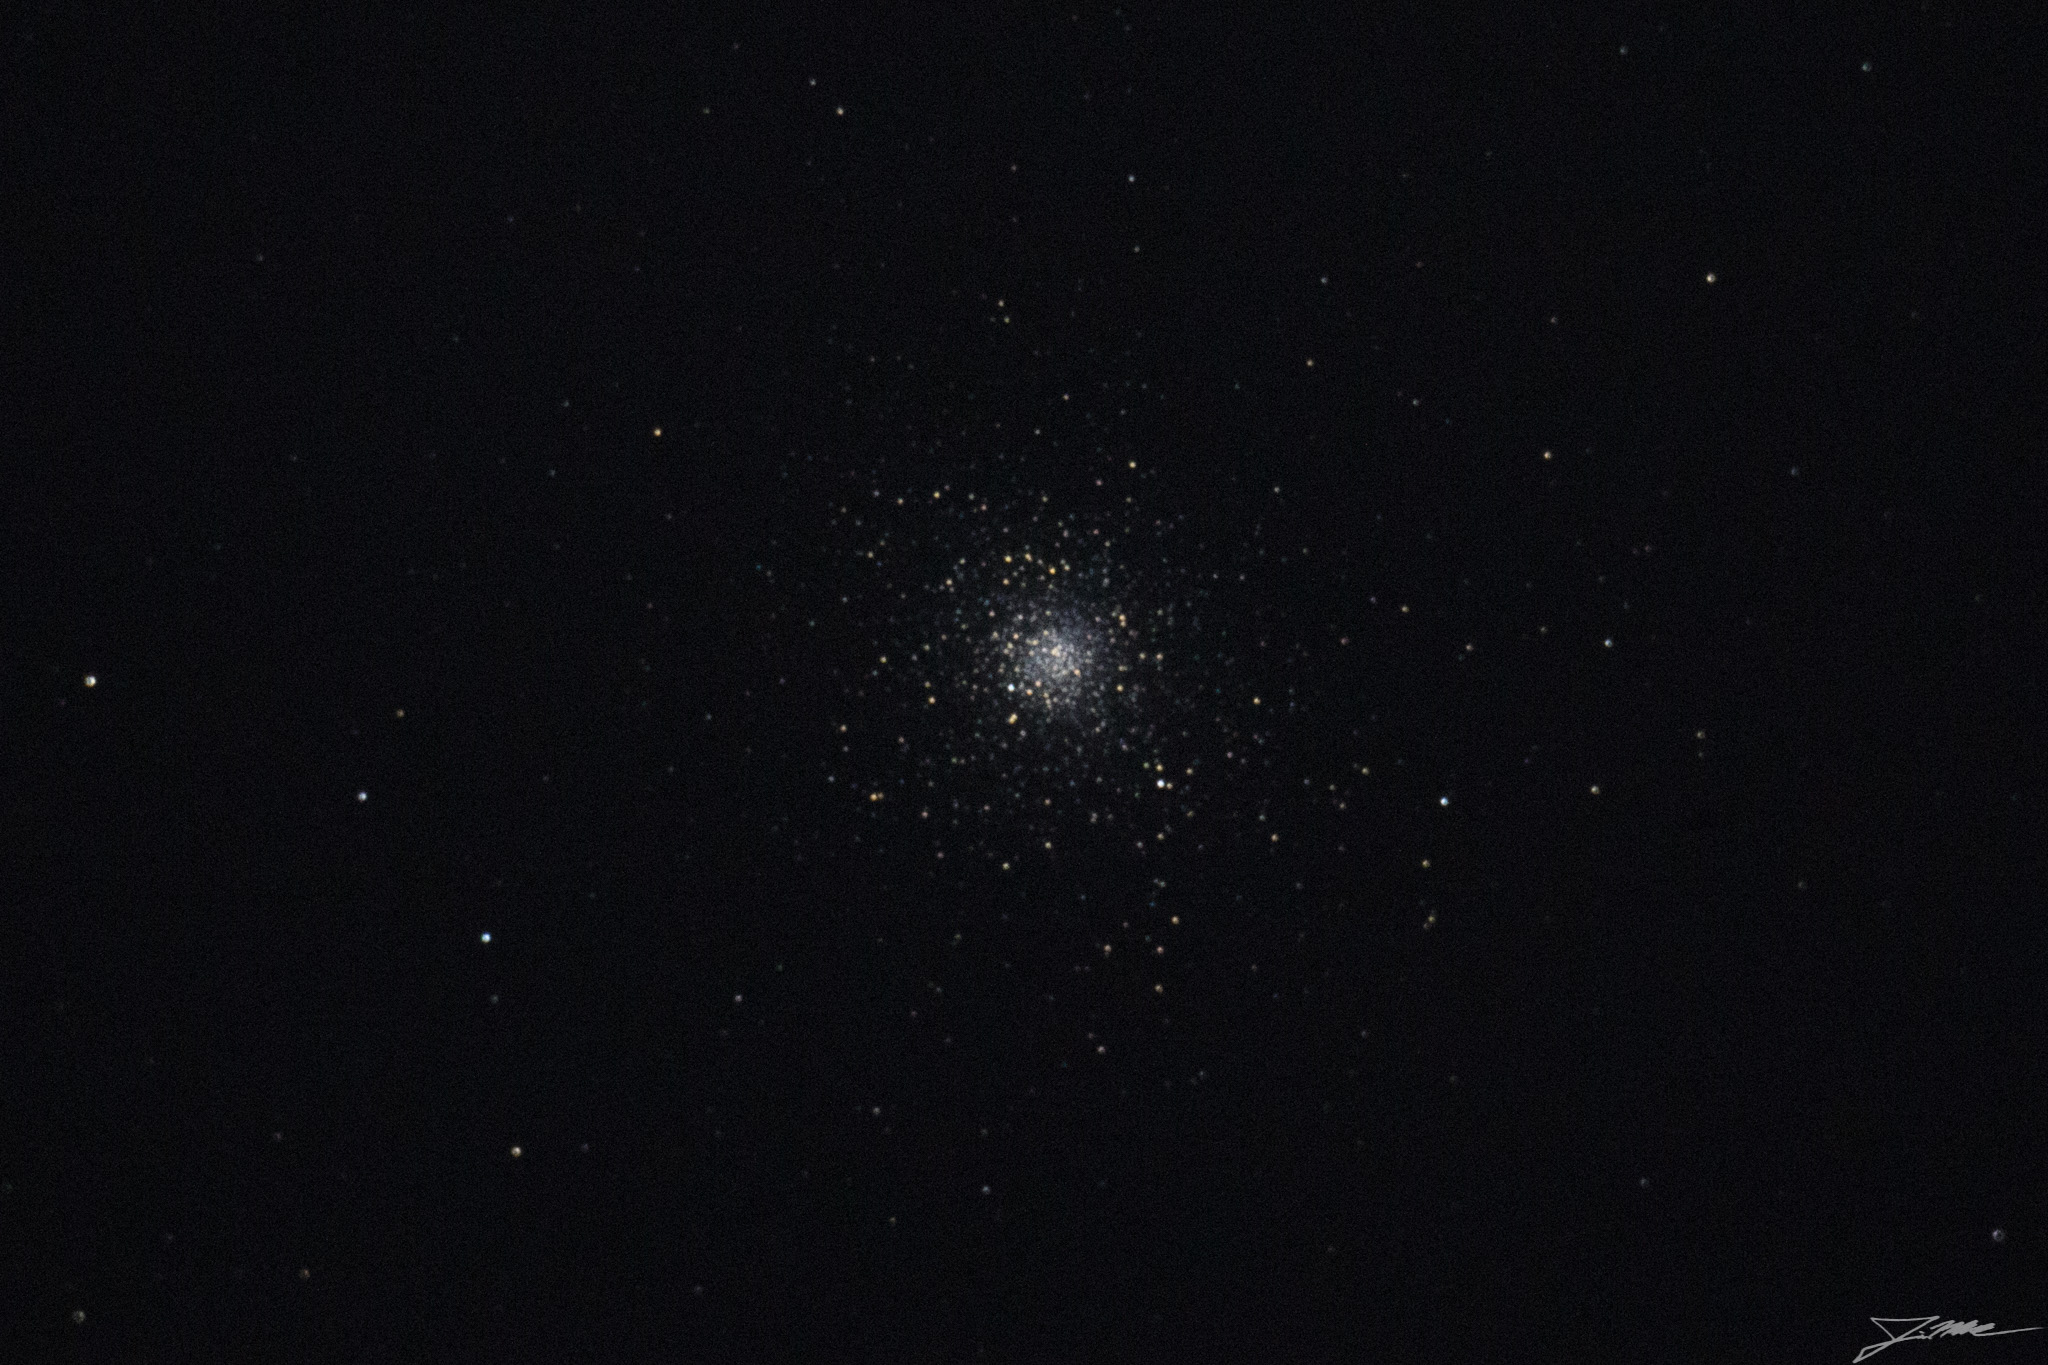
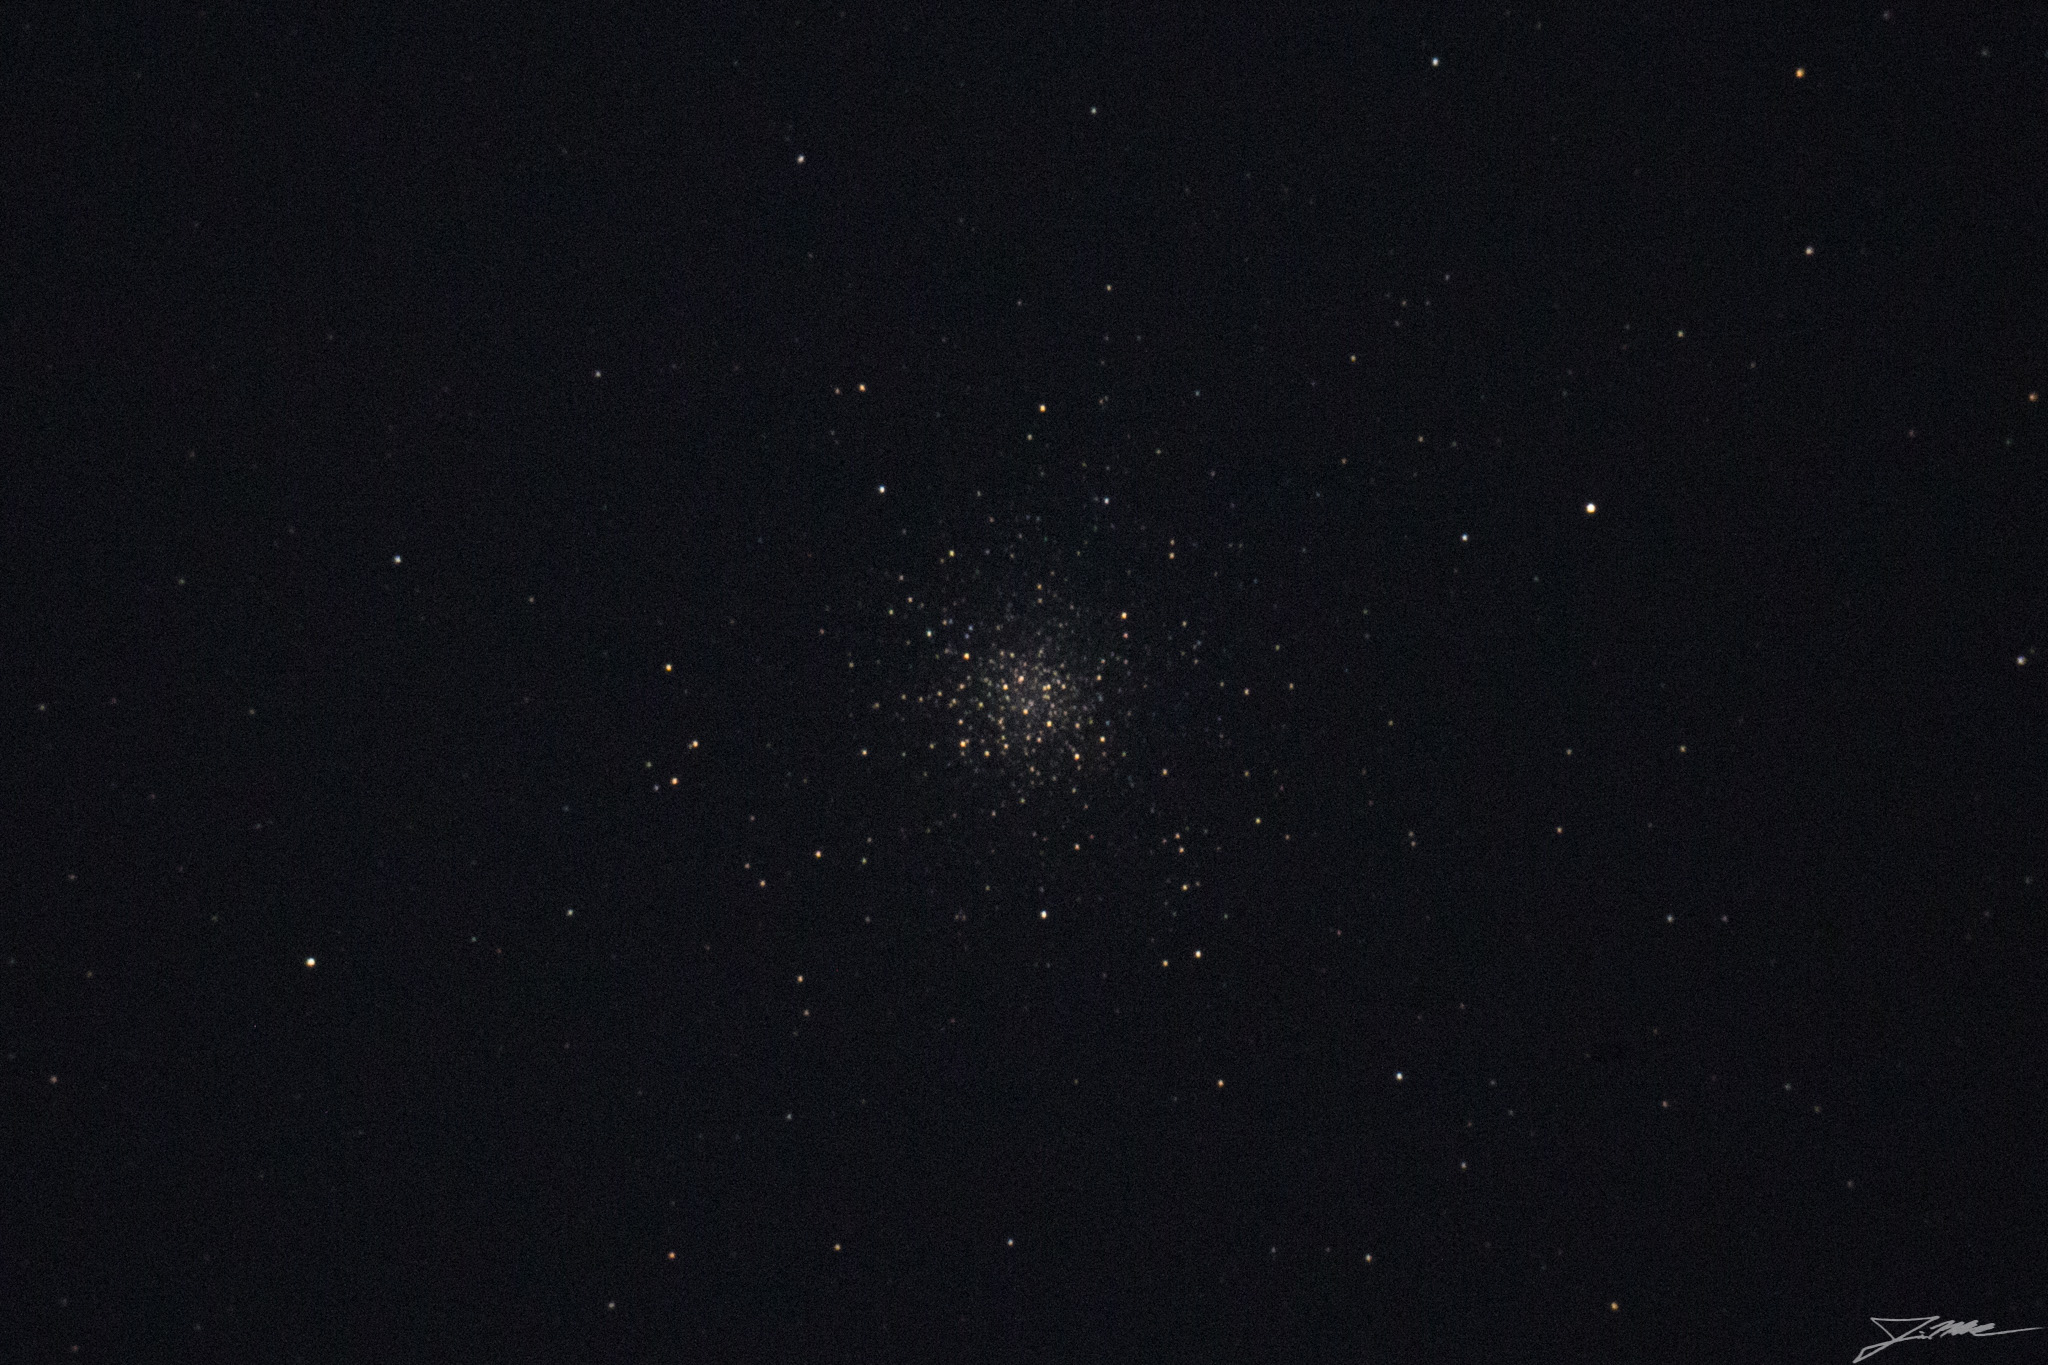
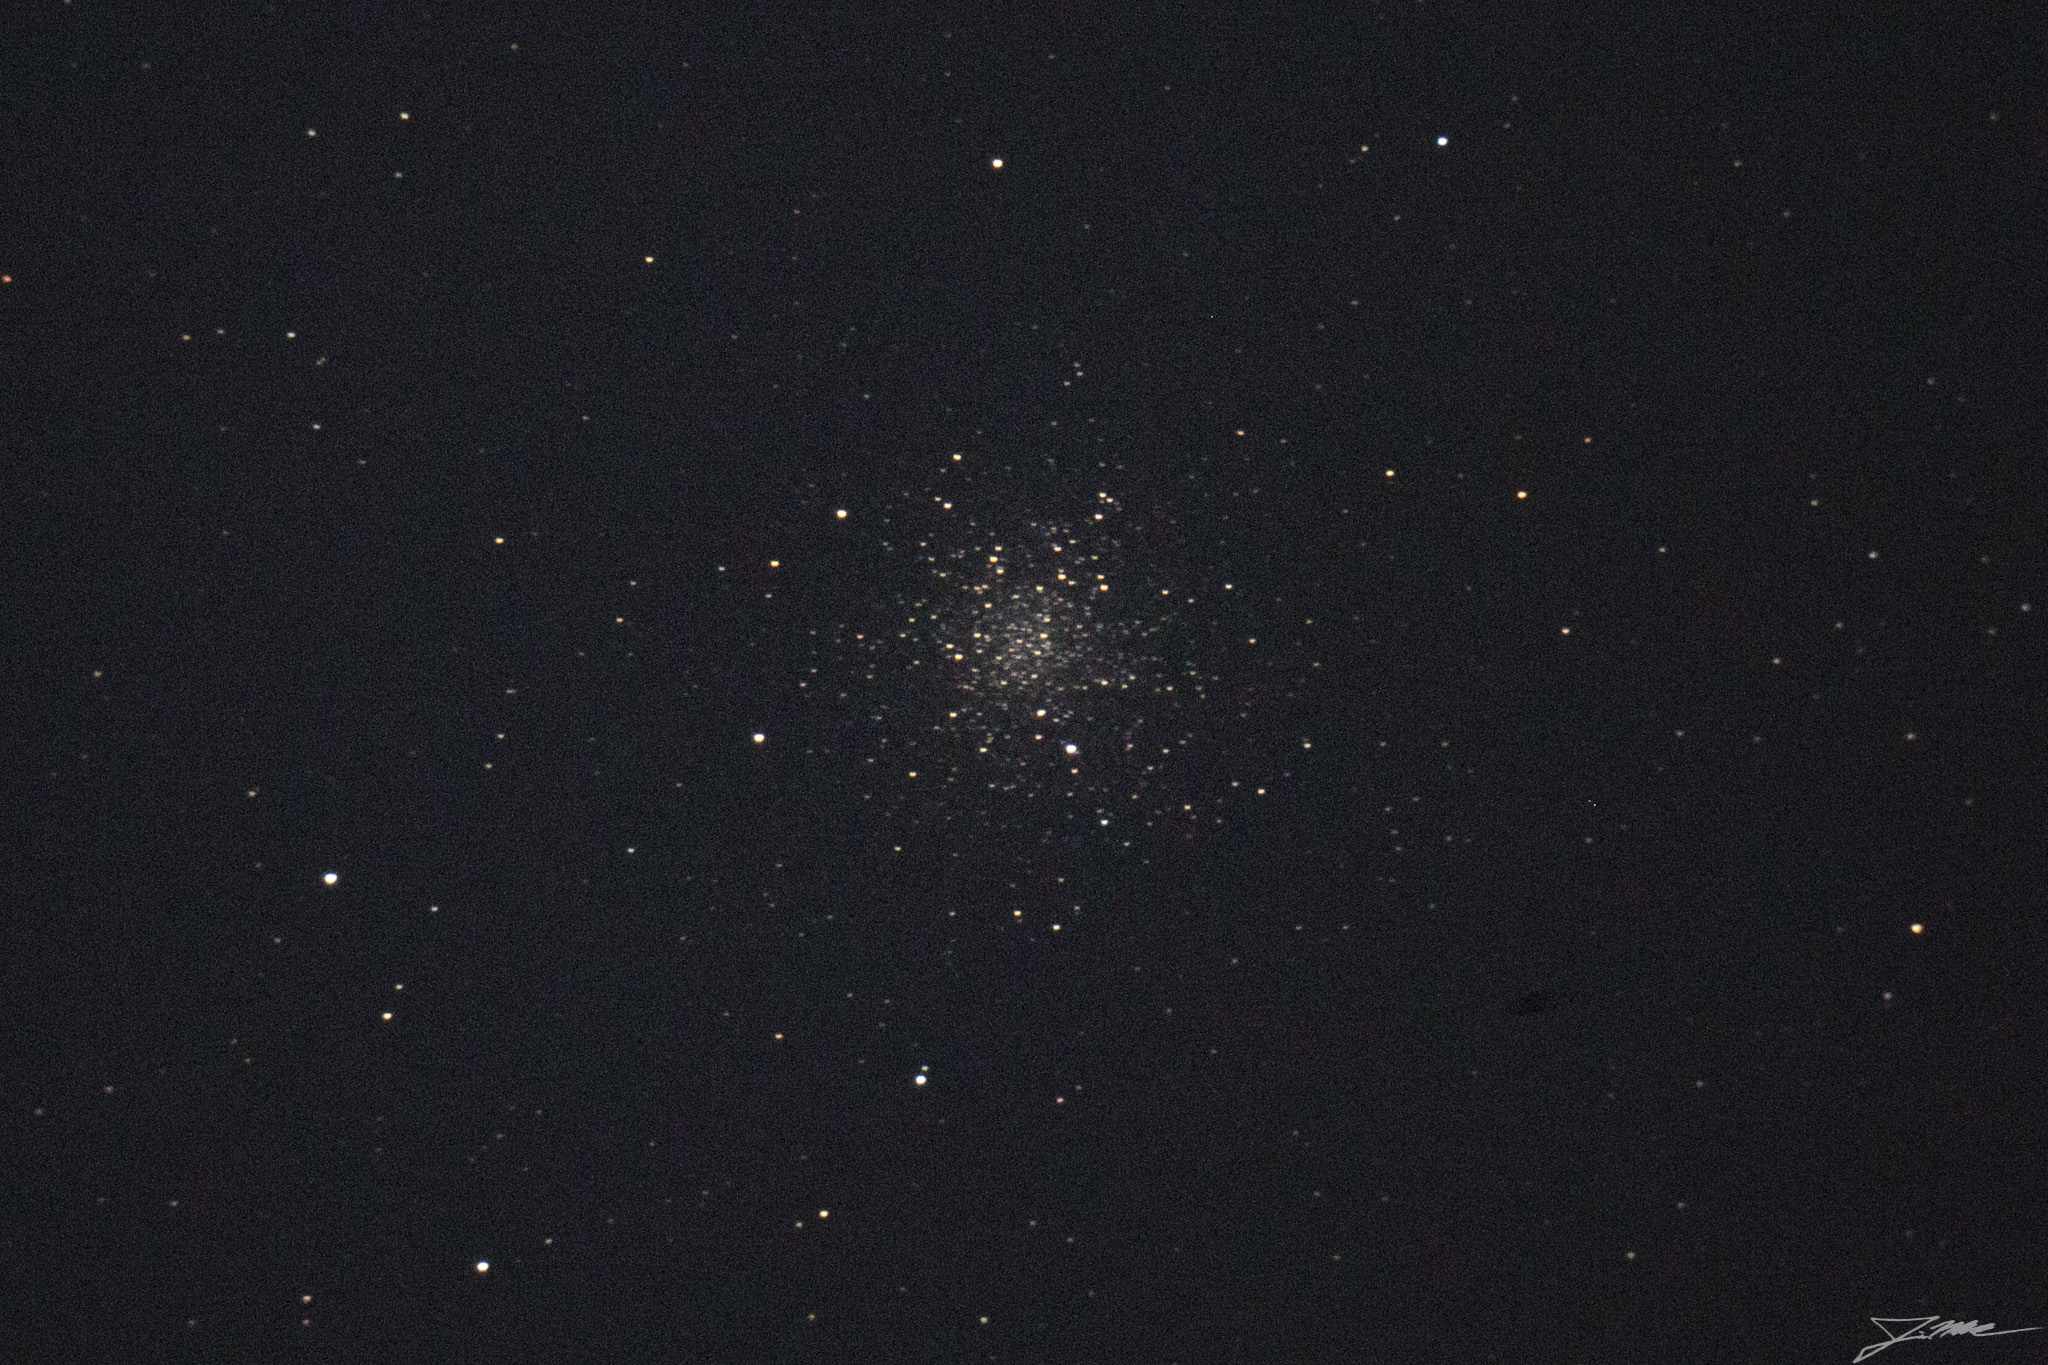
First, a processing note: All of these clusters are cropped to the same dimensions in Lightroom before uploading, so their relative size is directly comparable between photos. The field of view is 0.61° x 0.41°, which means that for scale, the full moon would fit across the width, but not across the height of these shots (apparent size of the moon is ~0.52°). All were shot at 2032mm, f/10. Exposure time and ISO will be listed with each shot.
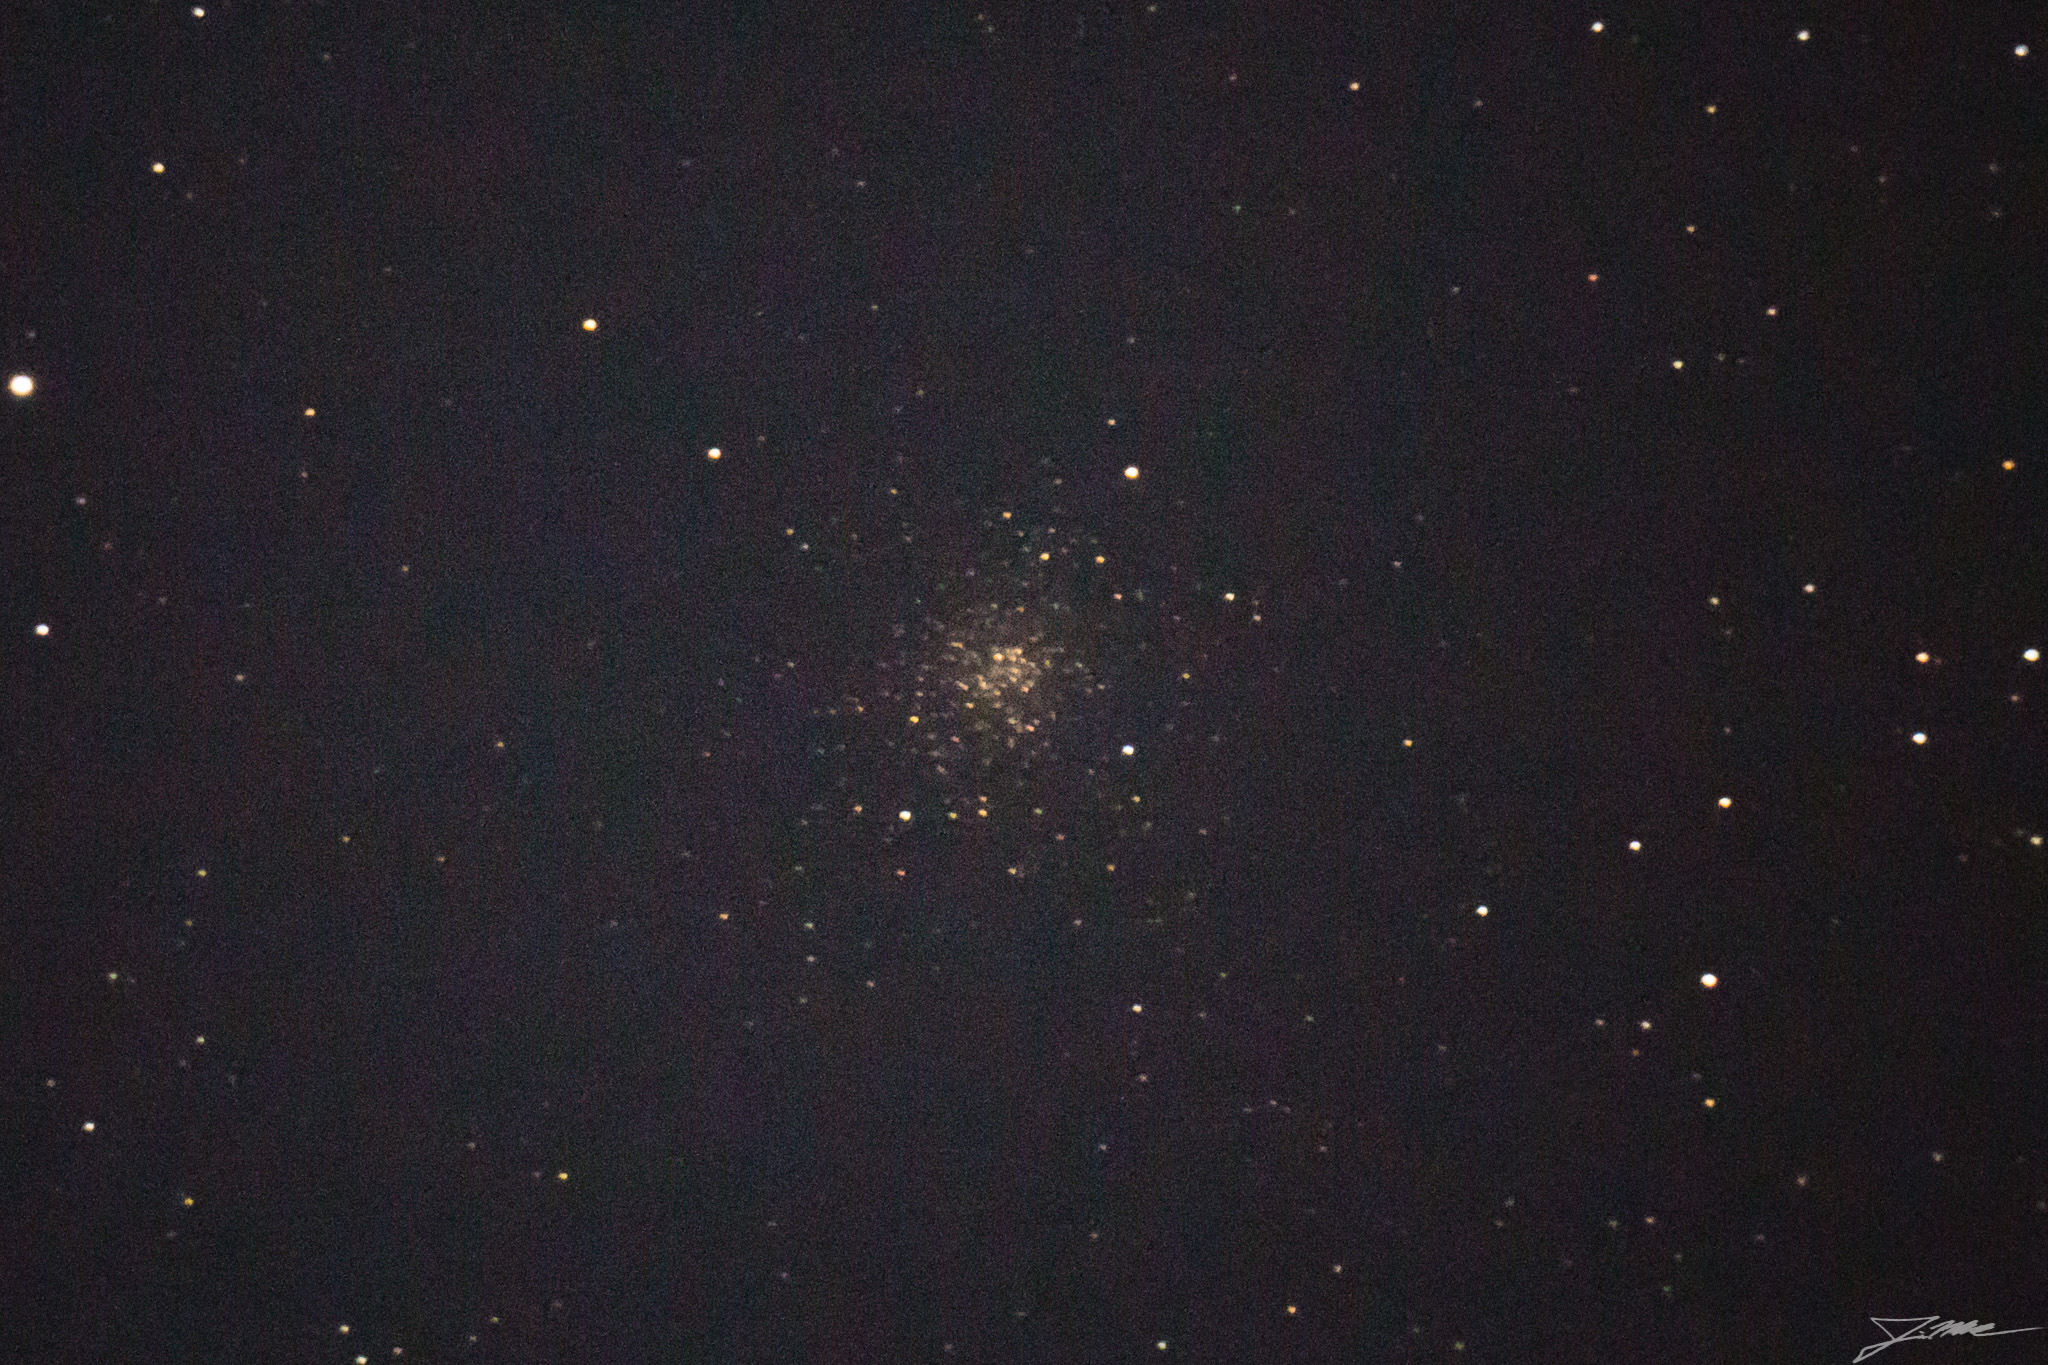
First up, the M3 Globular cluster in Canes Venatici (ISO 6,400, 11 sec):

Next, M53 Globular Cluster in Coma Berenices (ISO 6,400, 10 sec):
Third, the M5 Globular Cluster in Serpens (ISO 6,400, 10 sec):
Next, the M10 Globular Cluster in Ophiuchus (ISO 6,400, 10 sec):
Fifth, the M12 Globular Cluster in Ophiuchus (ISO 6,400, 20 sec):
Next, M107 Globular Cluster in Ophiuchus (ISO 12,800, 20 sec):
Followed by the M80 Globular cluster in Scorpius (ISO 12,800, 20 sec):

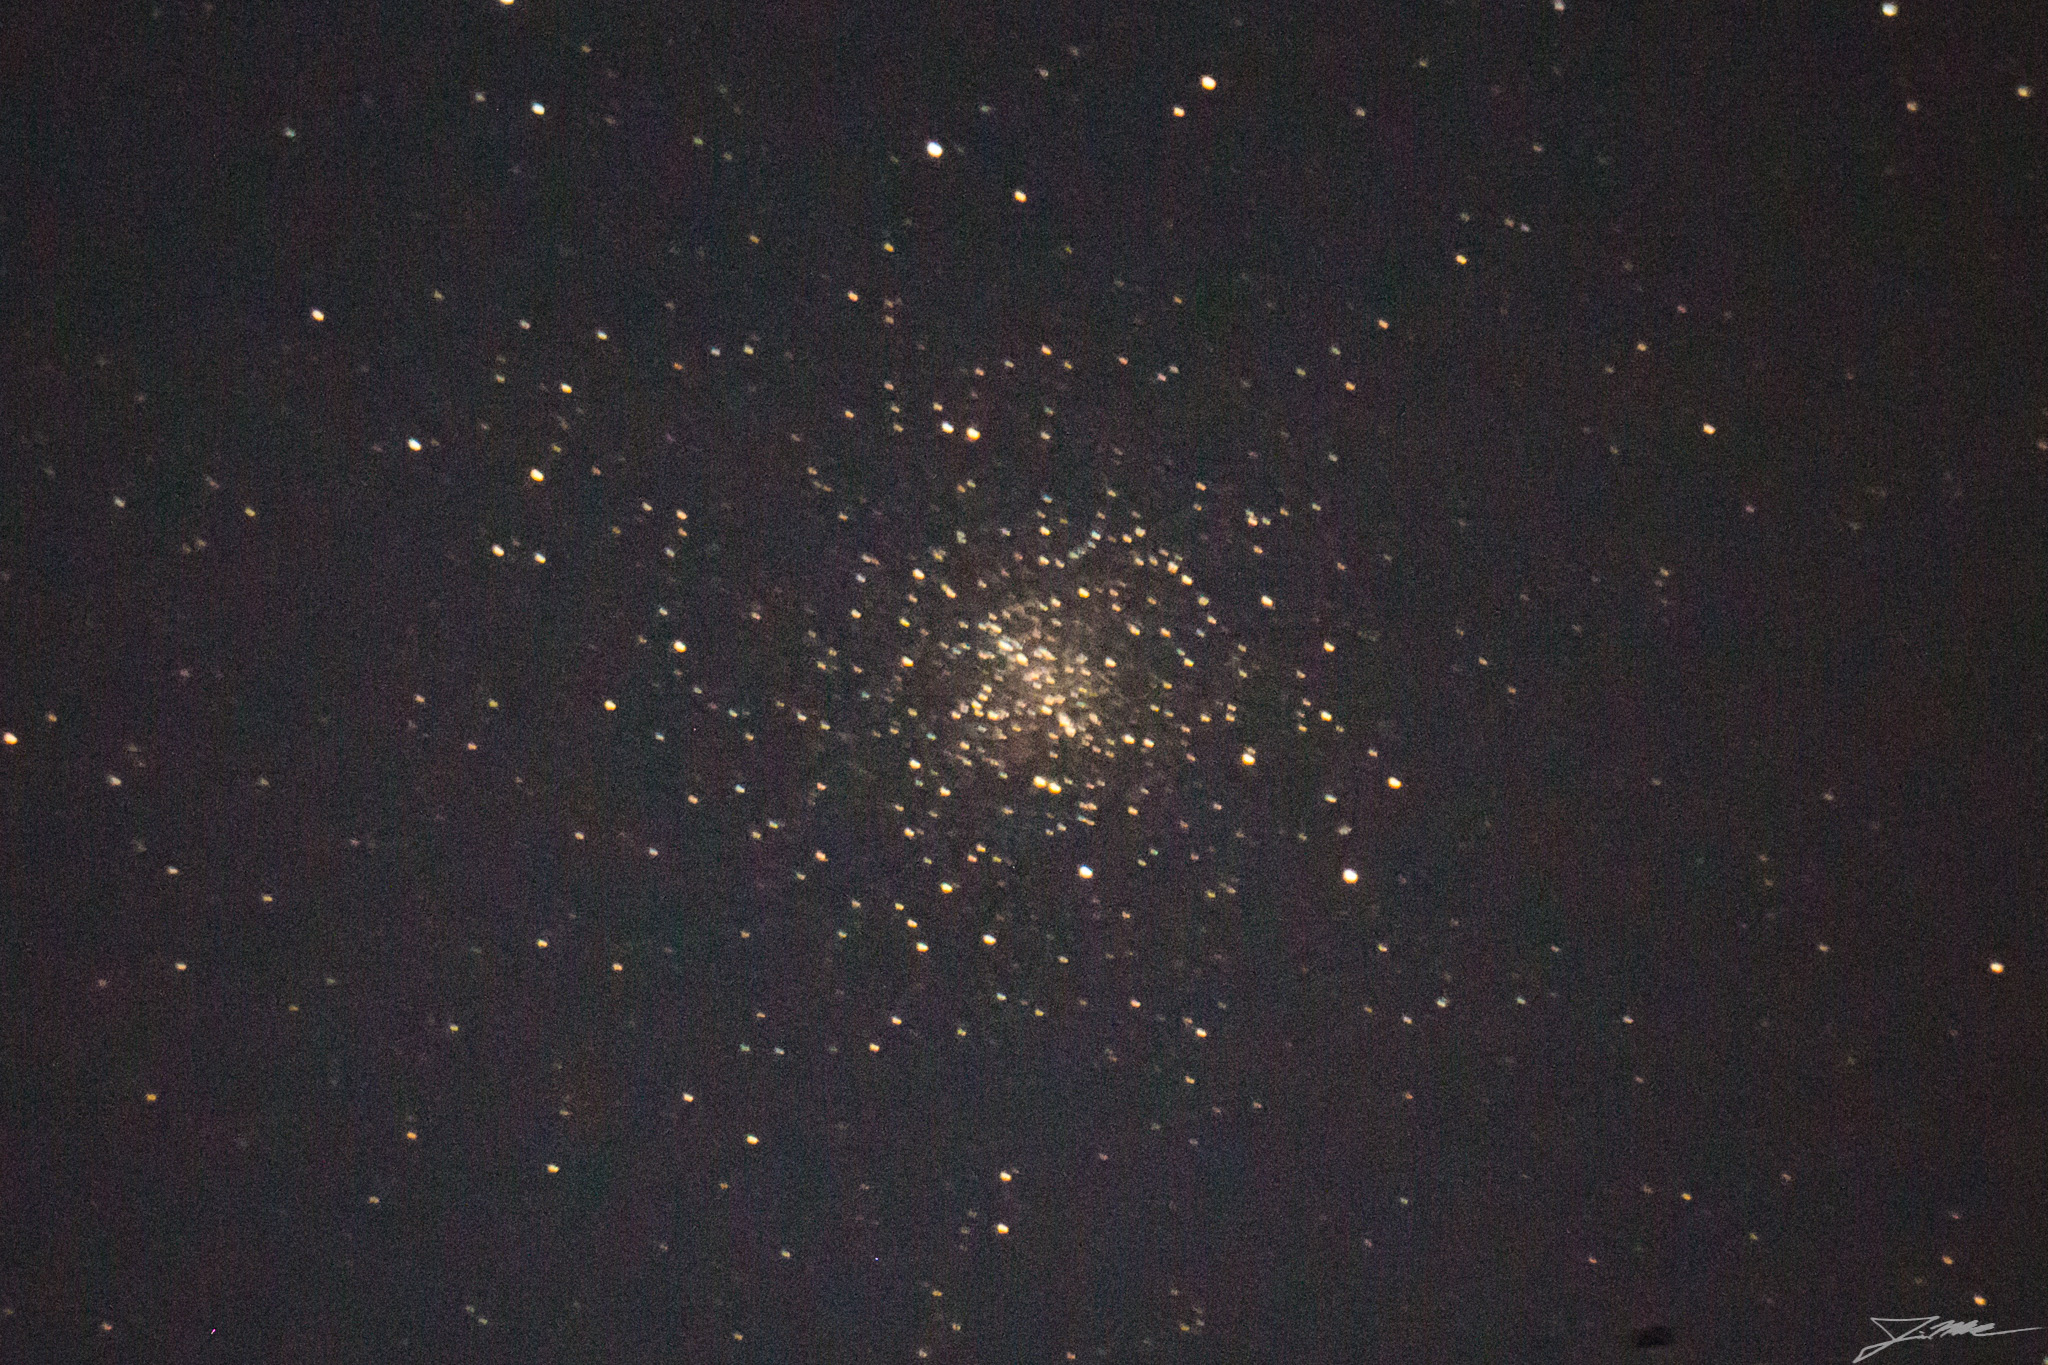
Eight, we have the rather large M4 Globular Cluster in Scorpius (ISO 12,800, 20 sec):
Ninth, the M19 Globular Cluster in Ophiuchus (ISO 6,400, 20 sec):

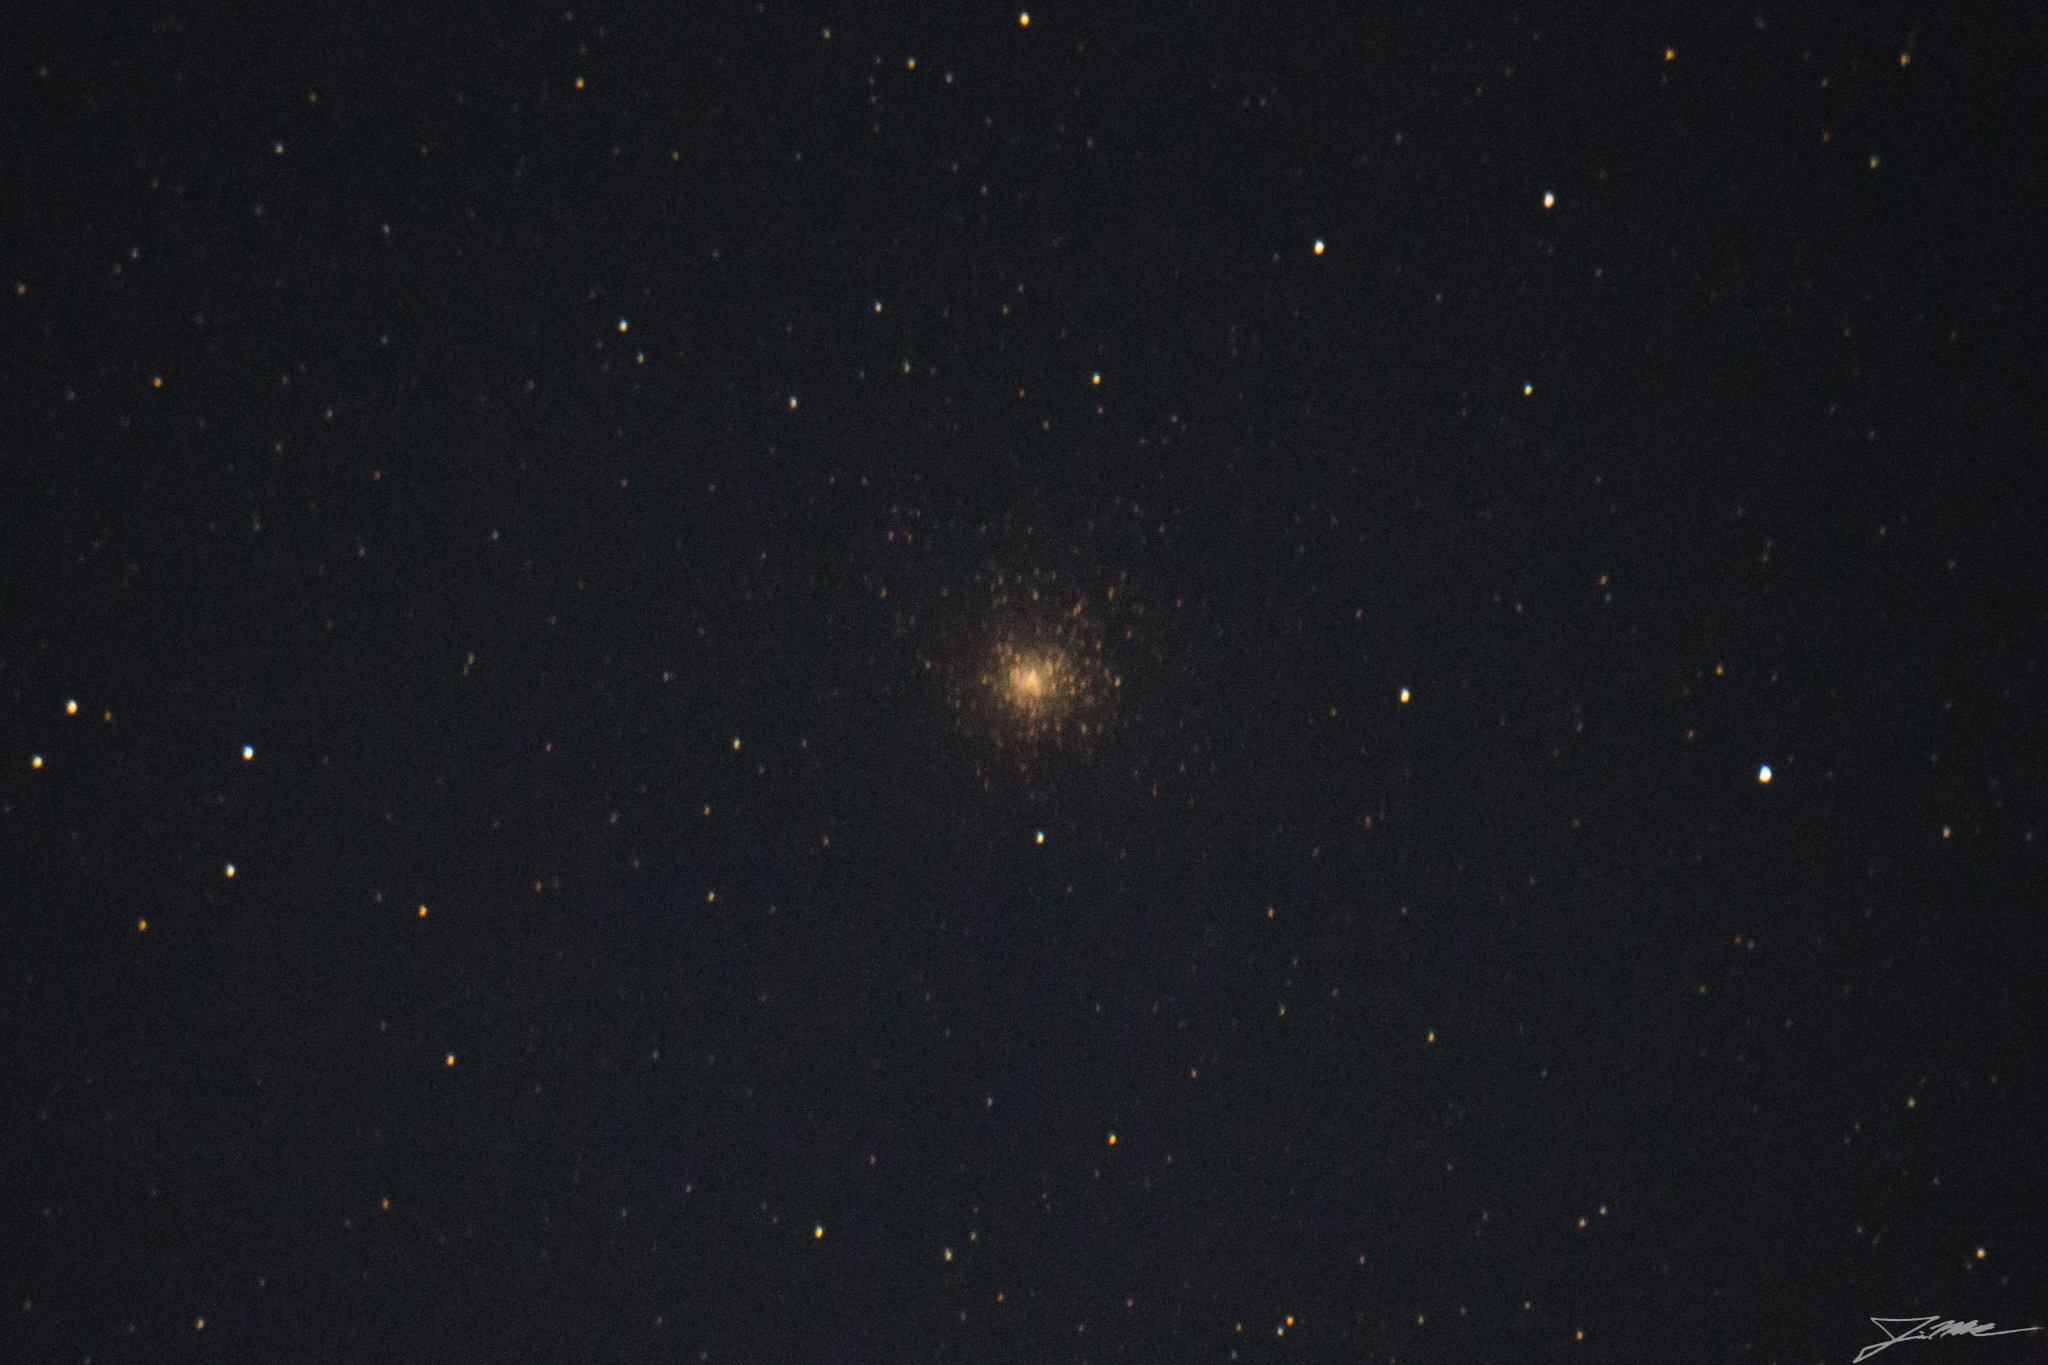
And lastly for the clusters, M62 Globular Cluster in Ophiuchus (ISO 6,400, 20 sec):
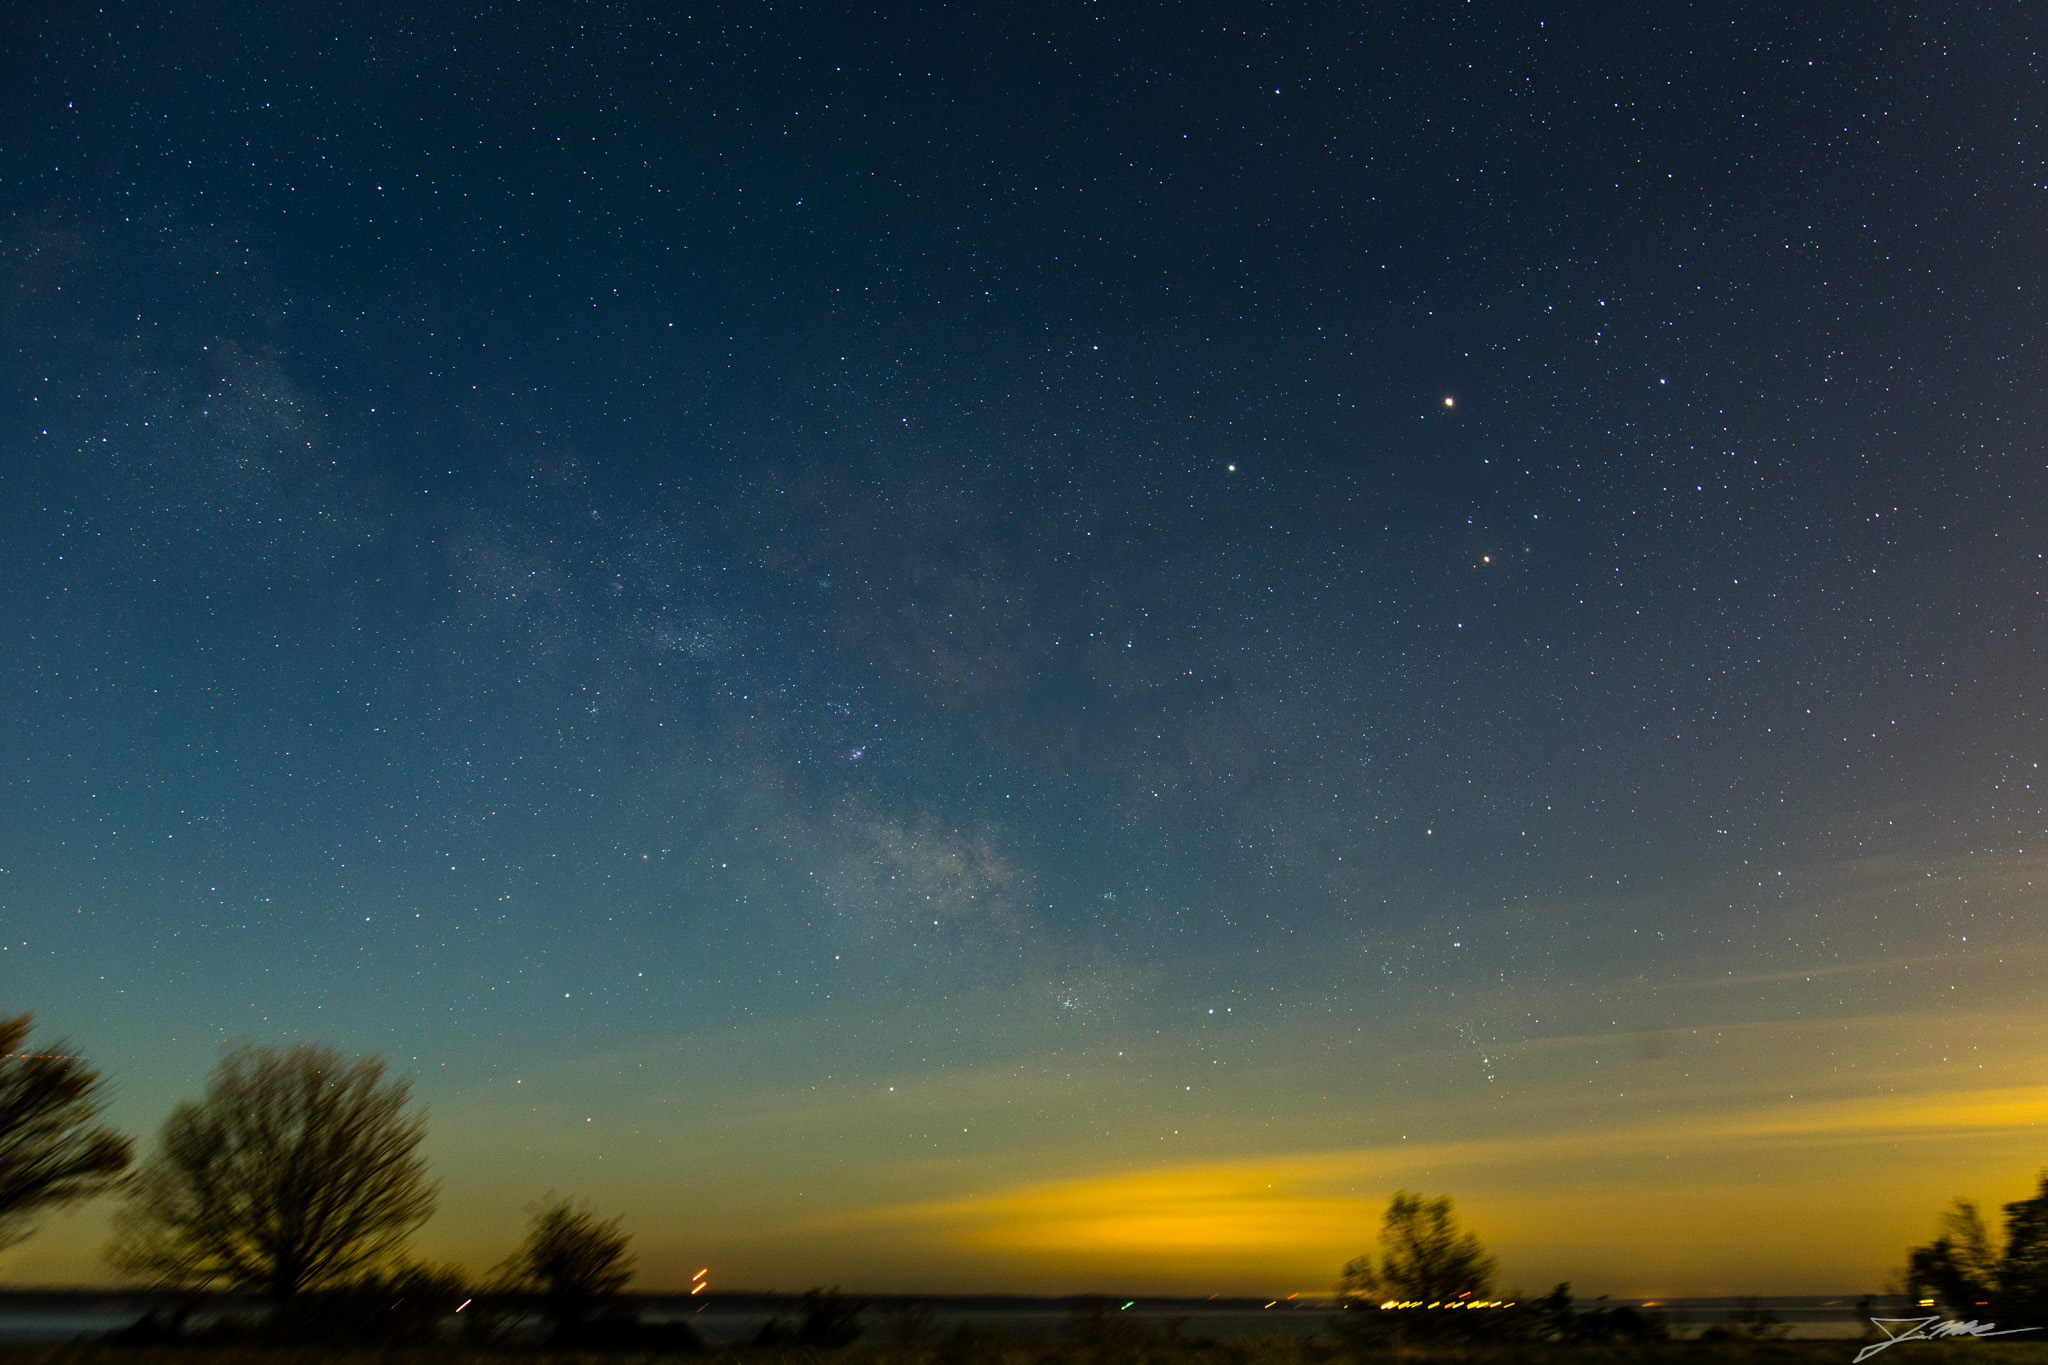
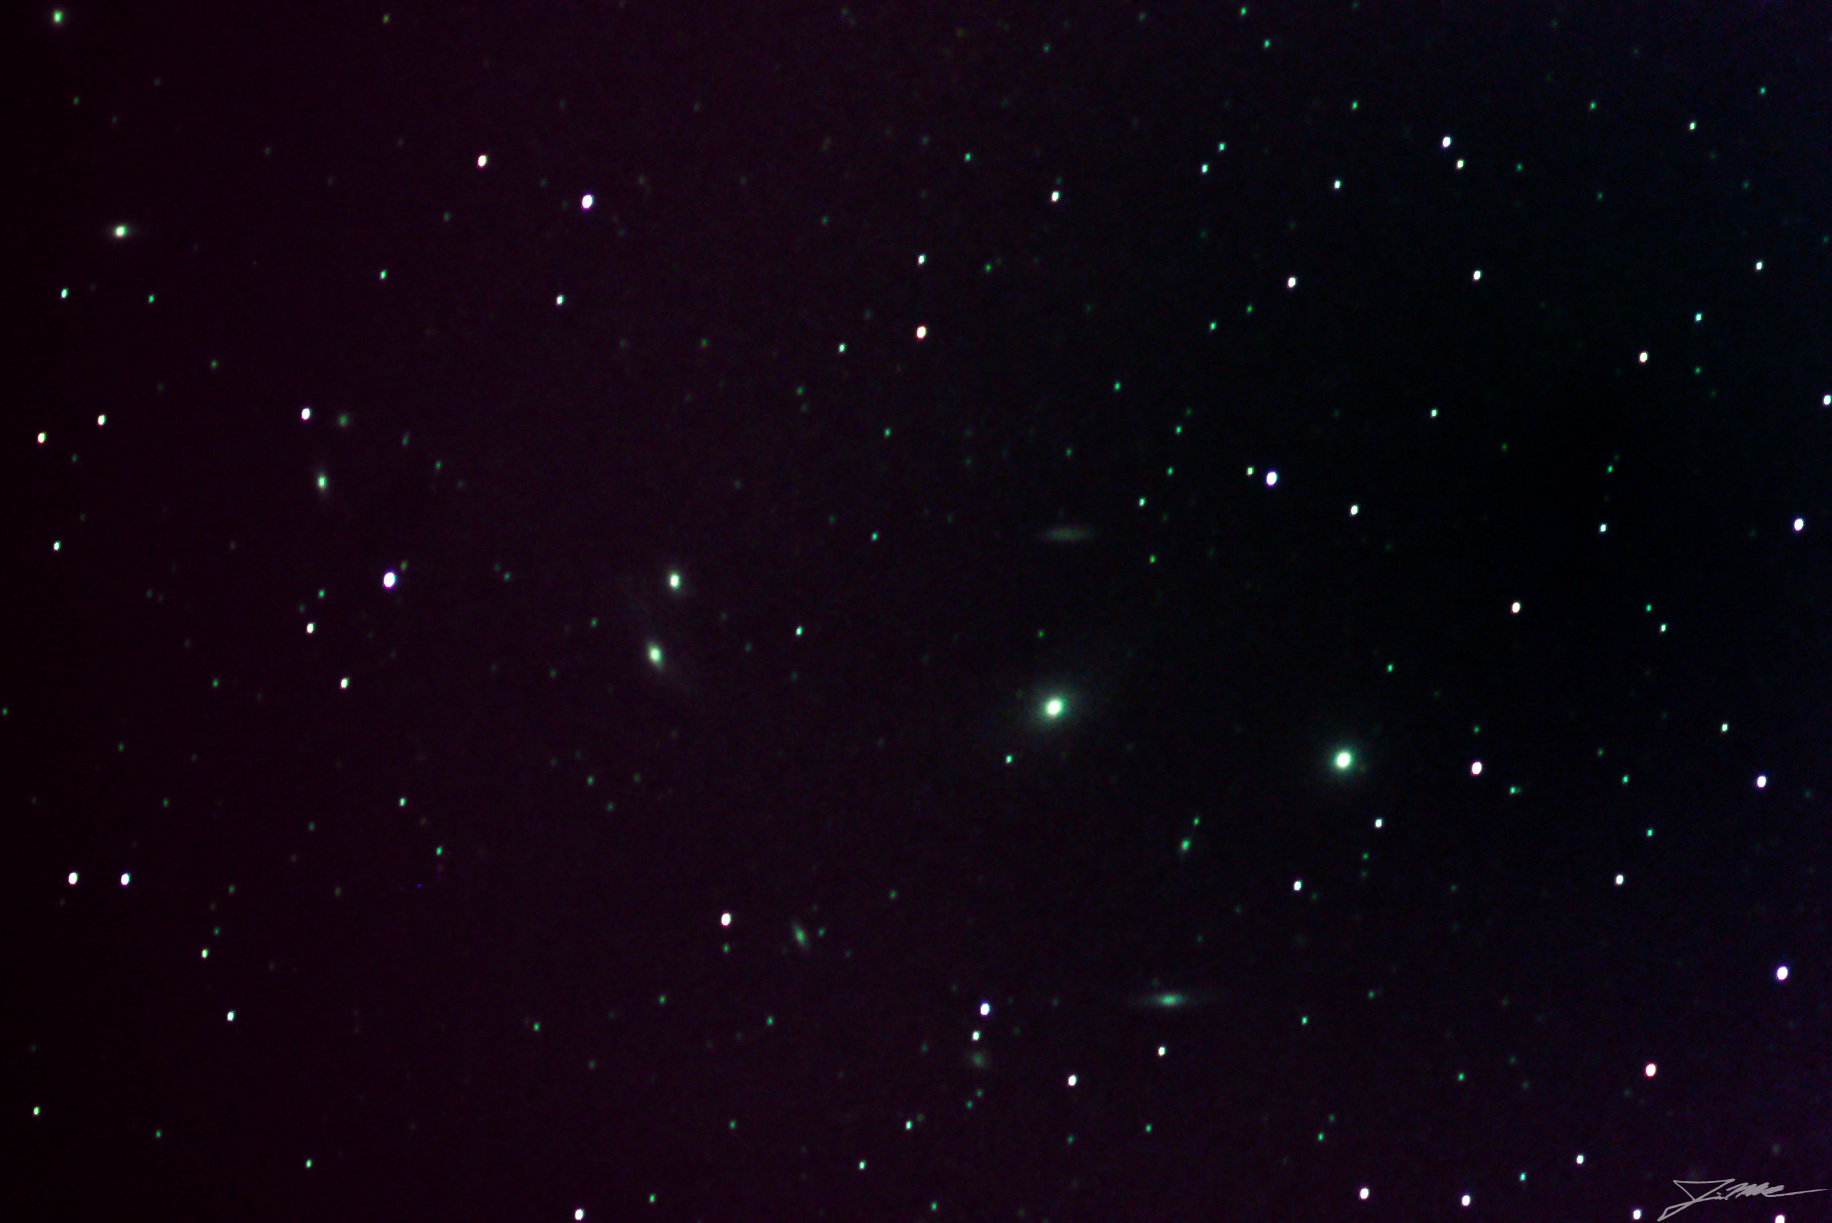
Despite there being a good bit of skyglow about, I thought I’d give Markarian’s Chain a go. I didn’t get very good results zoomed in through the big scope, but managed a string of decent 2-minute exposures with the 400mm Vivitar riding piggypack, and was able to stack them for some decent noise reduction. This definitely would have benefited from darks, flats, and bias frames, but I came out ill-prepared, and since it was near the end of the coffee, I just shot the lights and hoped they’d turn out okay in stacking. This image contains at least 8 visible galaxies, two of which are Messier objects (M84 and M86), bringing my total to 13 for the evening:
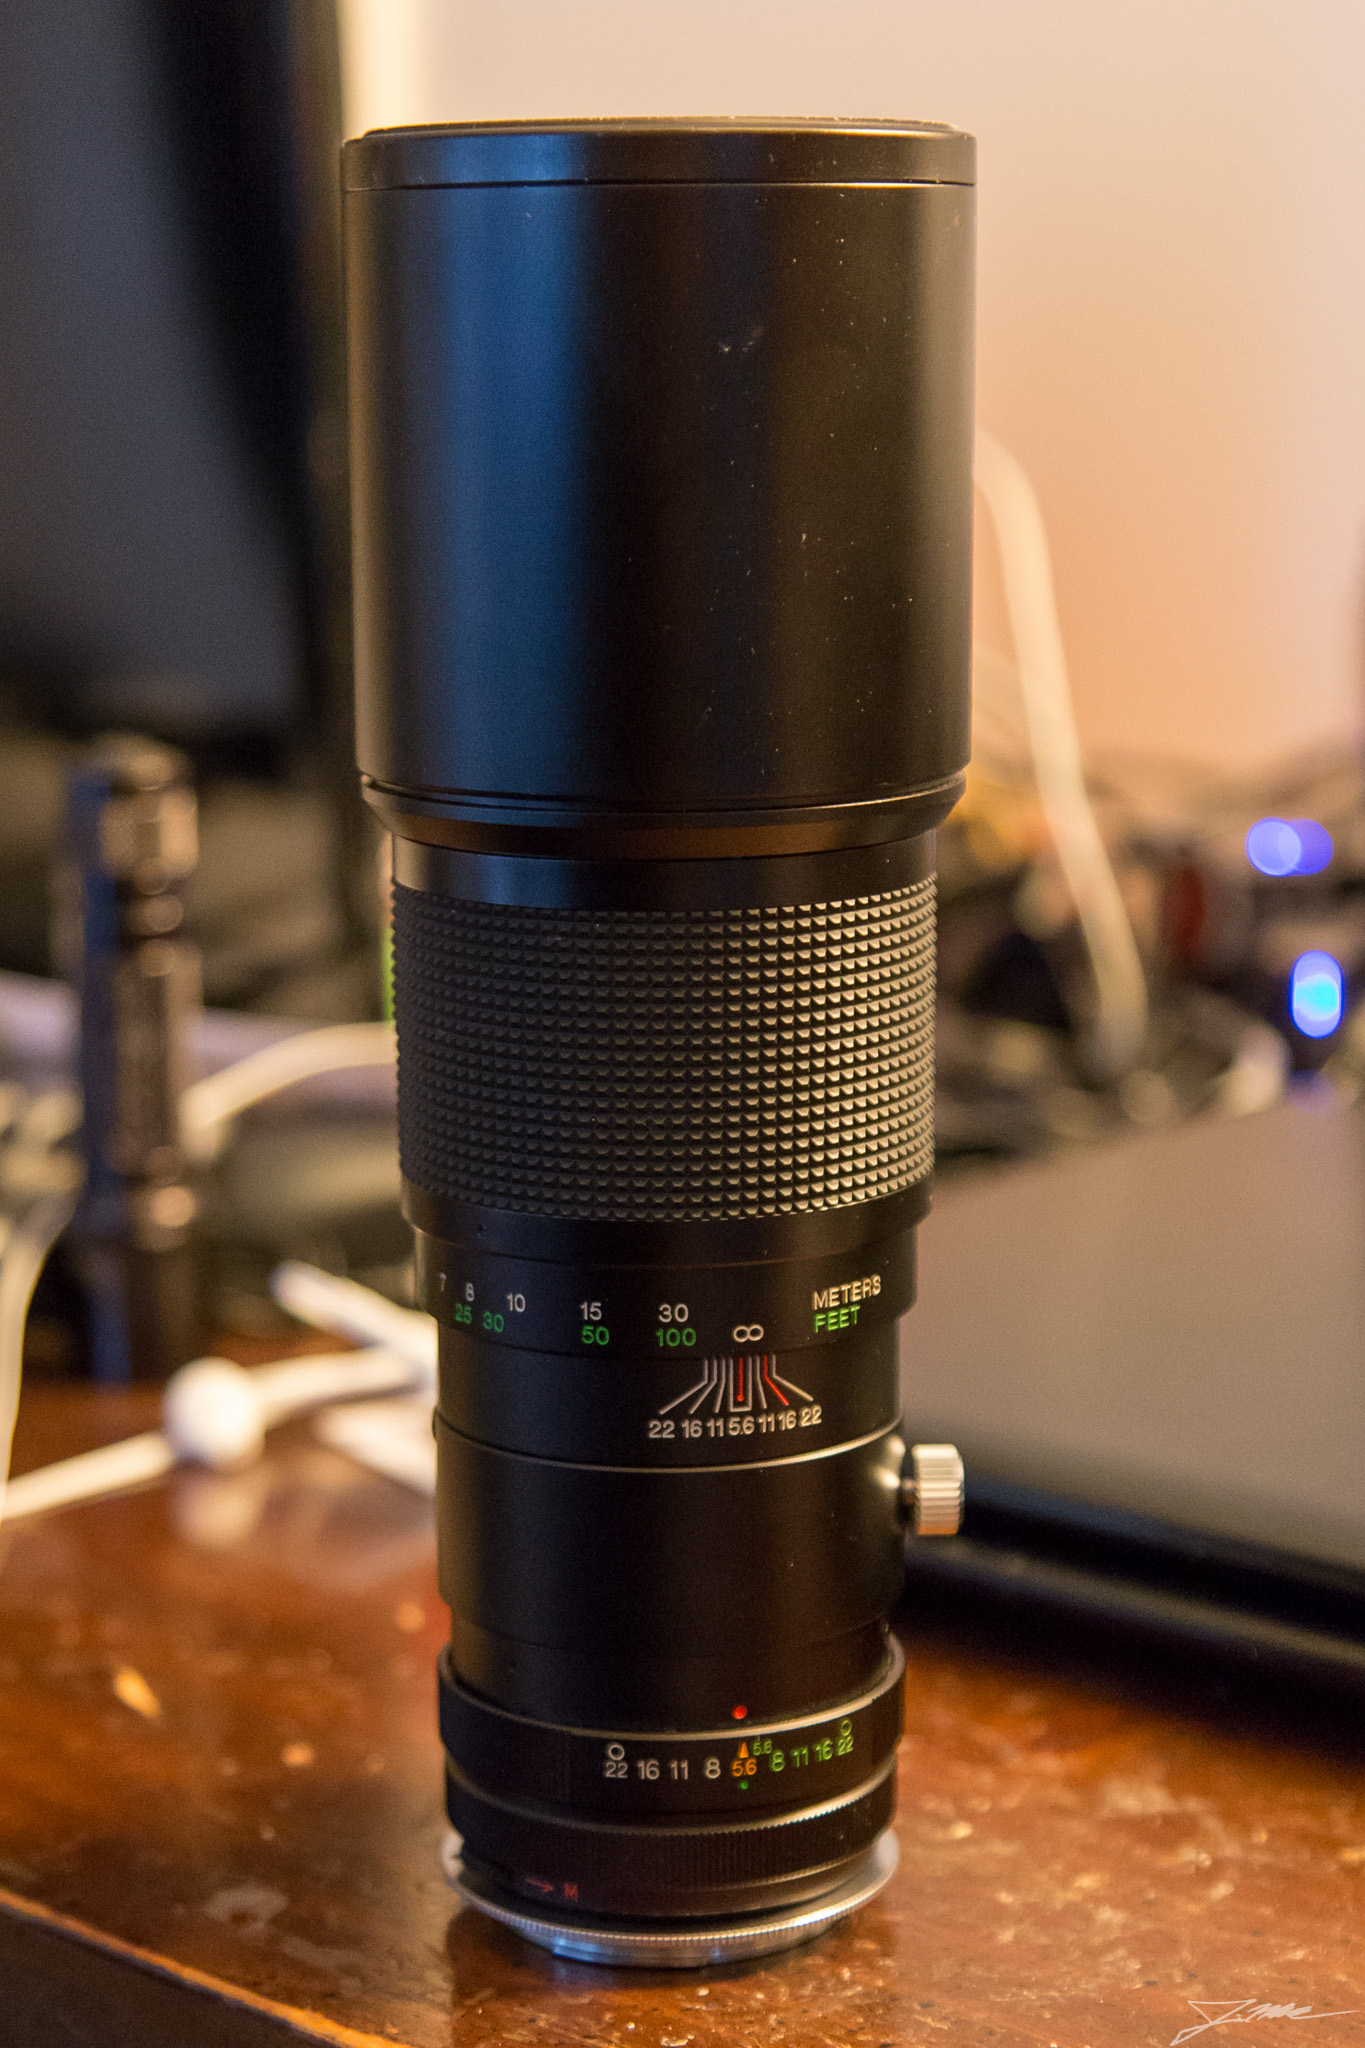
One of the disadvantages of the 400mm Vivitar is that it ALMOST focuses at infinity when it’s warm, and only gets fully to infinity focus when the lens is cold (~40° or so). This is fine over the winter, but pretty much kills the lens for summer shooting, and puts it behind the 300mm Vivitar I have. I’m still trying to pick between them… I really like the way the 400 renders color and the FOV it has on the full-frame 6D, but keep running into issues like this focus problem. Since adding a bit of glass to the imaging train moves the focal point back, if I could do so without adding to the length of the lens, it would allow me to focus past infinity when the lens is warm, thus ensuring I can use it all summer as well. The other drawback to this lens is the chromatic aberration at the blue end of the spectrum… so by adding the right piece of glass, I should be able to knock out both the focal problem AND the abberation problem.
As I was poking around trying to figure out how to accomplish this, I noted that the internal neck-down point between the TX flange and the M42 adapter looked surprisingly close to 1.25″, a standard size for telescope eyepieces. I had a polarizing filter laying around, and lo and behold… it FIT! Being at the smallest portion of the lens interior, I knew it wouldn’t bother the maximum aperture of the lens too much, which was a huge bonus. It also meant that I should be able to find an appropriate piece of glass mounted in an eyepiece ring to make this work. After a bit of research, I discovered that while the Baader Fringe-Killer filter is very good for fixing this issue with cheaper achromatic scopes (essentially what this lens is), it was also $78 for the 1.25″ sized filter. Ugh. With a bit more Google-fu, I was able to find out that guys were getting pretty reasonable results by using a #8 yellow filter instead, since it blocks most of the blue wavelengths, and leaves the rest alone. It does not, however have an IR cut to reduce infrared signal getting to astro-camera sensors, but since the dSLR isn’t especially sensitive at IR wavelengths due to the built-in IR filter… I thought I’d give it a try. I found an el-cheapo #8 filter on Amazon, but since it would take 2-4 WEEKS to ship, and with shipping it ended up being only $2 cheaper than another filter I could get in 2 days with Prime… I sprung for the $16 filter.
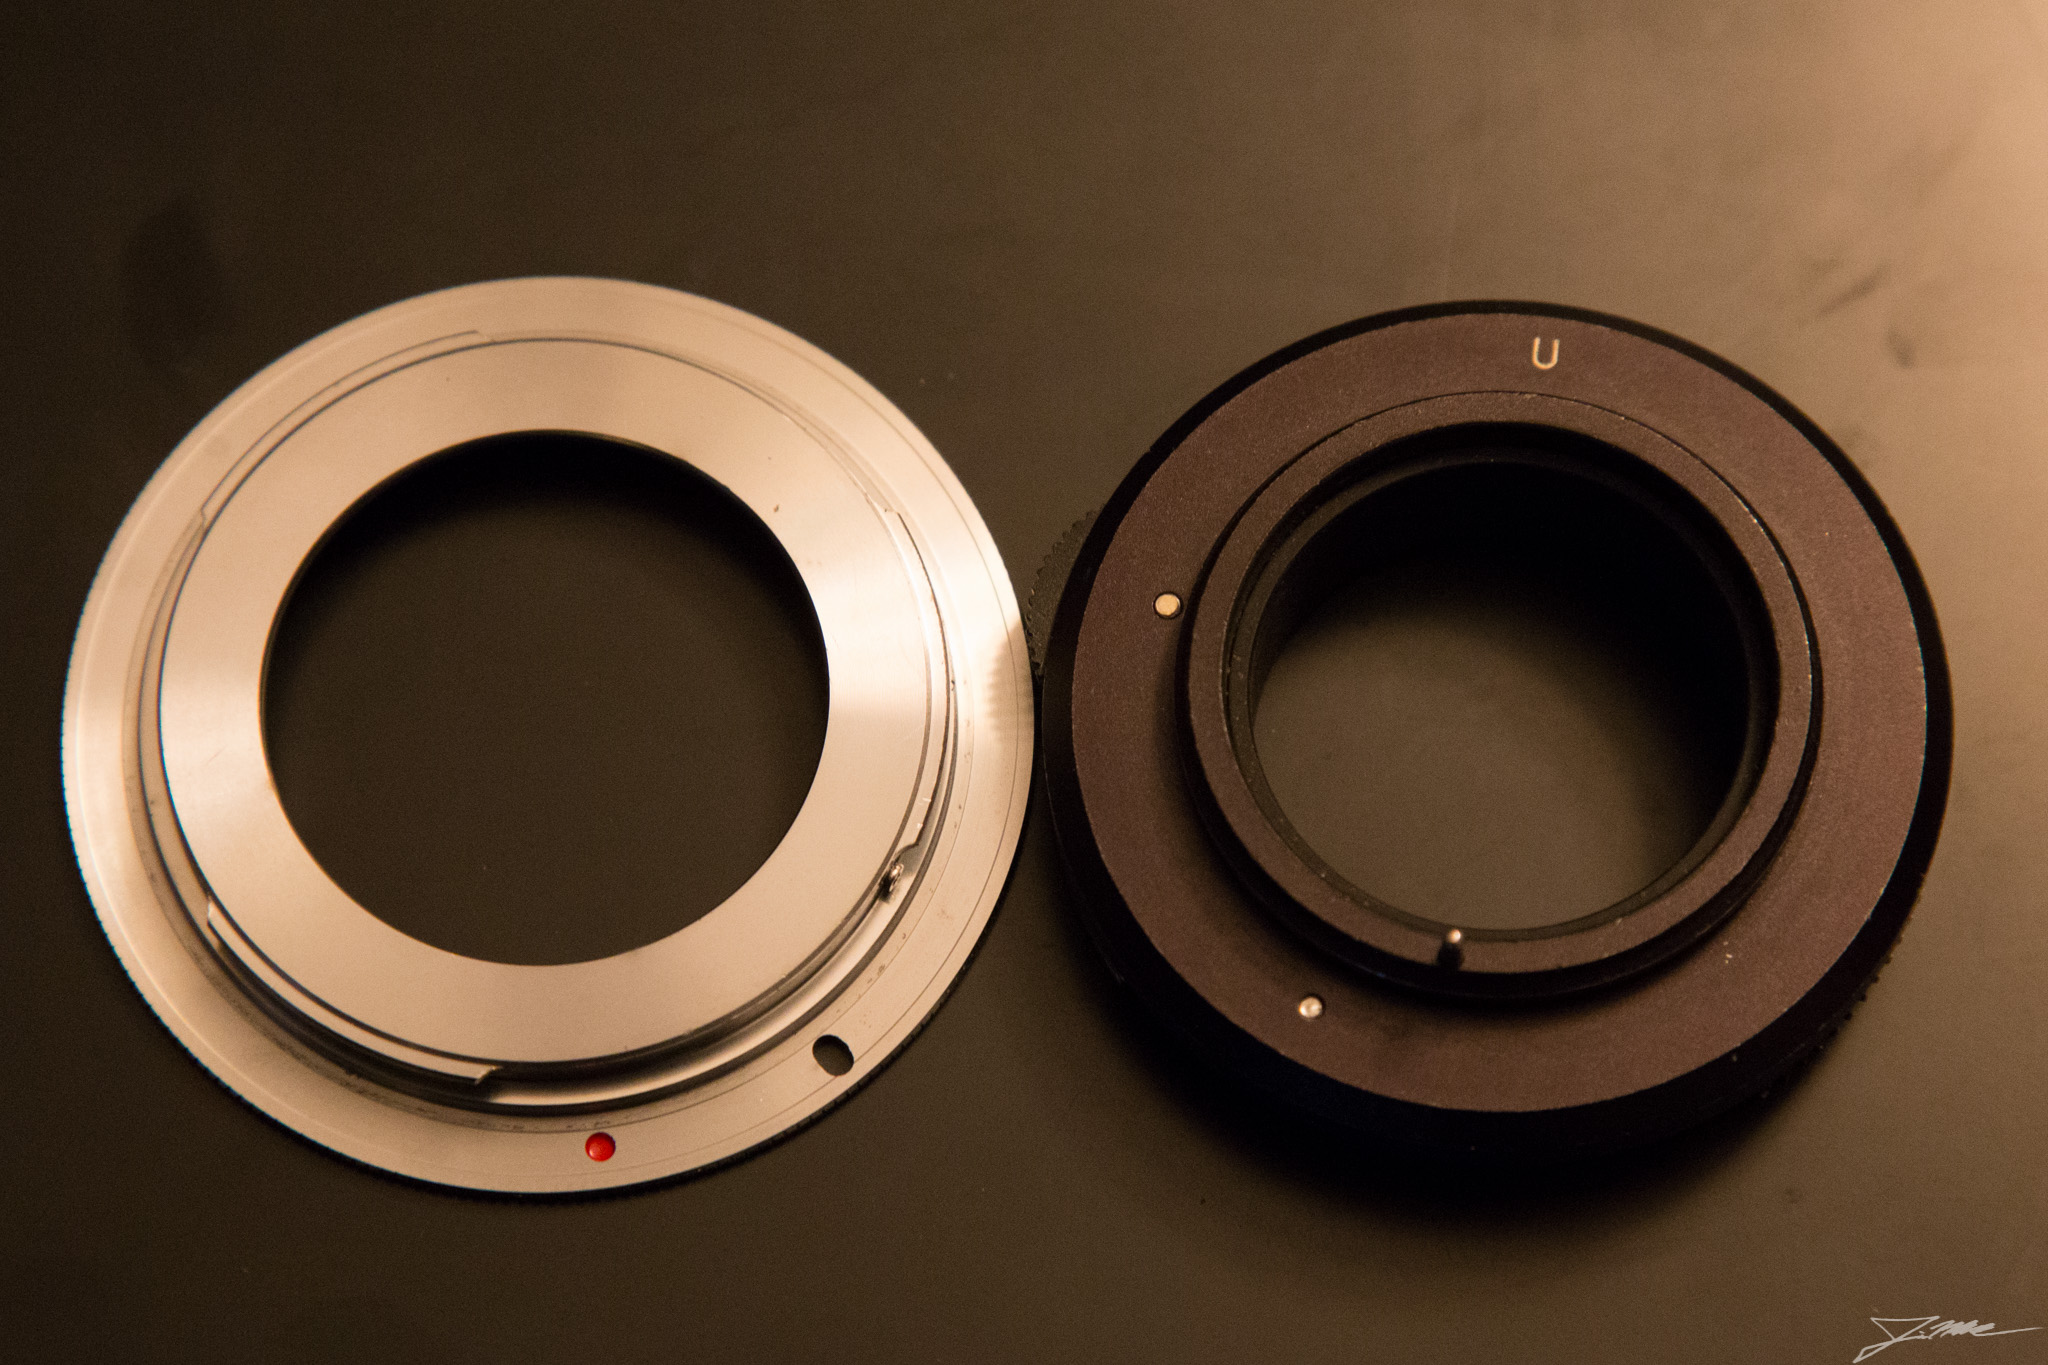
Bottom line: It WORKS. Totally stoked. Lens came with a Nikon mount, so I bought a TX to M42 and M42 to EF adapters. I didn’t buy a Nikon to EF adapter since I wasn’t certain exactly which Nikon mount it was until I did a LOT more research. Seems I could have gone that route, but I likely wouldn’t have run into the infinity focus problem, which would have meant I wouldn’t have known to try and solve the CA problem at the same time… All told, I have less than $100 in this lens, to include the extra adapters, the filter, and shipping for all the various pieces. And while it’s not taking pictures like an APO (apochromatic) scope, it’s also less than 1/5 the cost of the smallest, cheapest APOs available.
TX-mount lens with M42x.75 adapter:
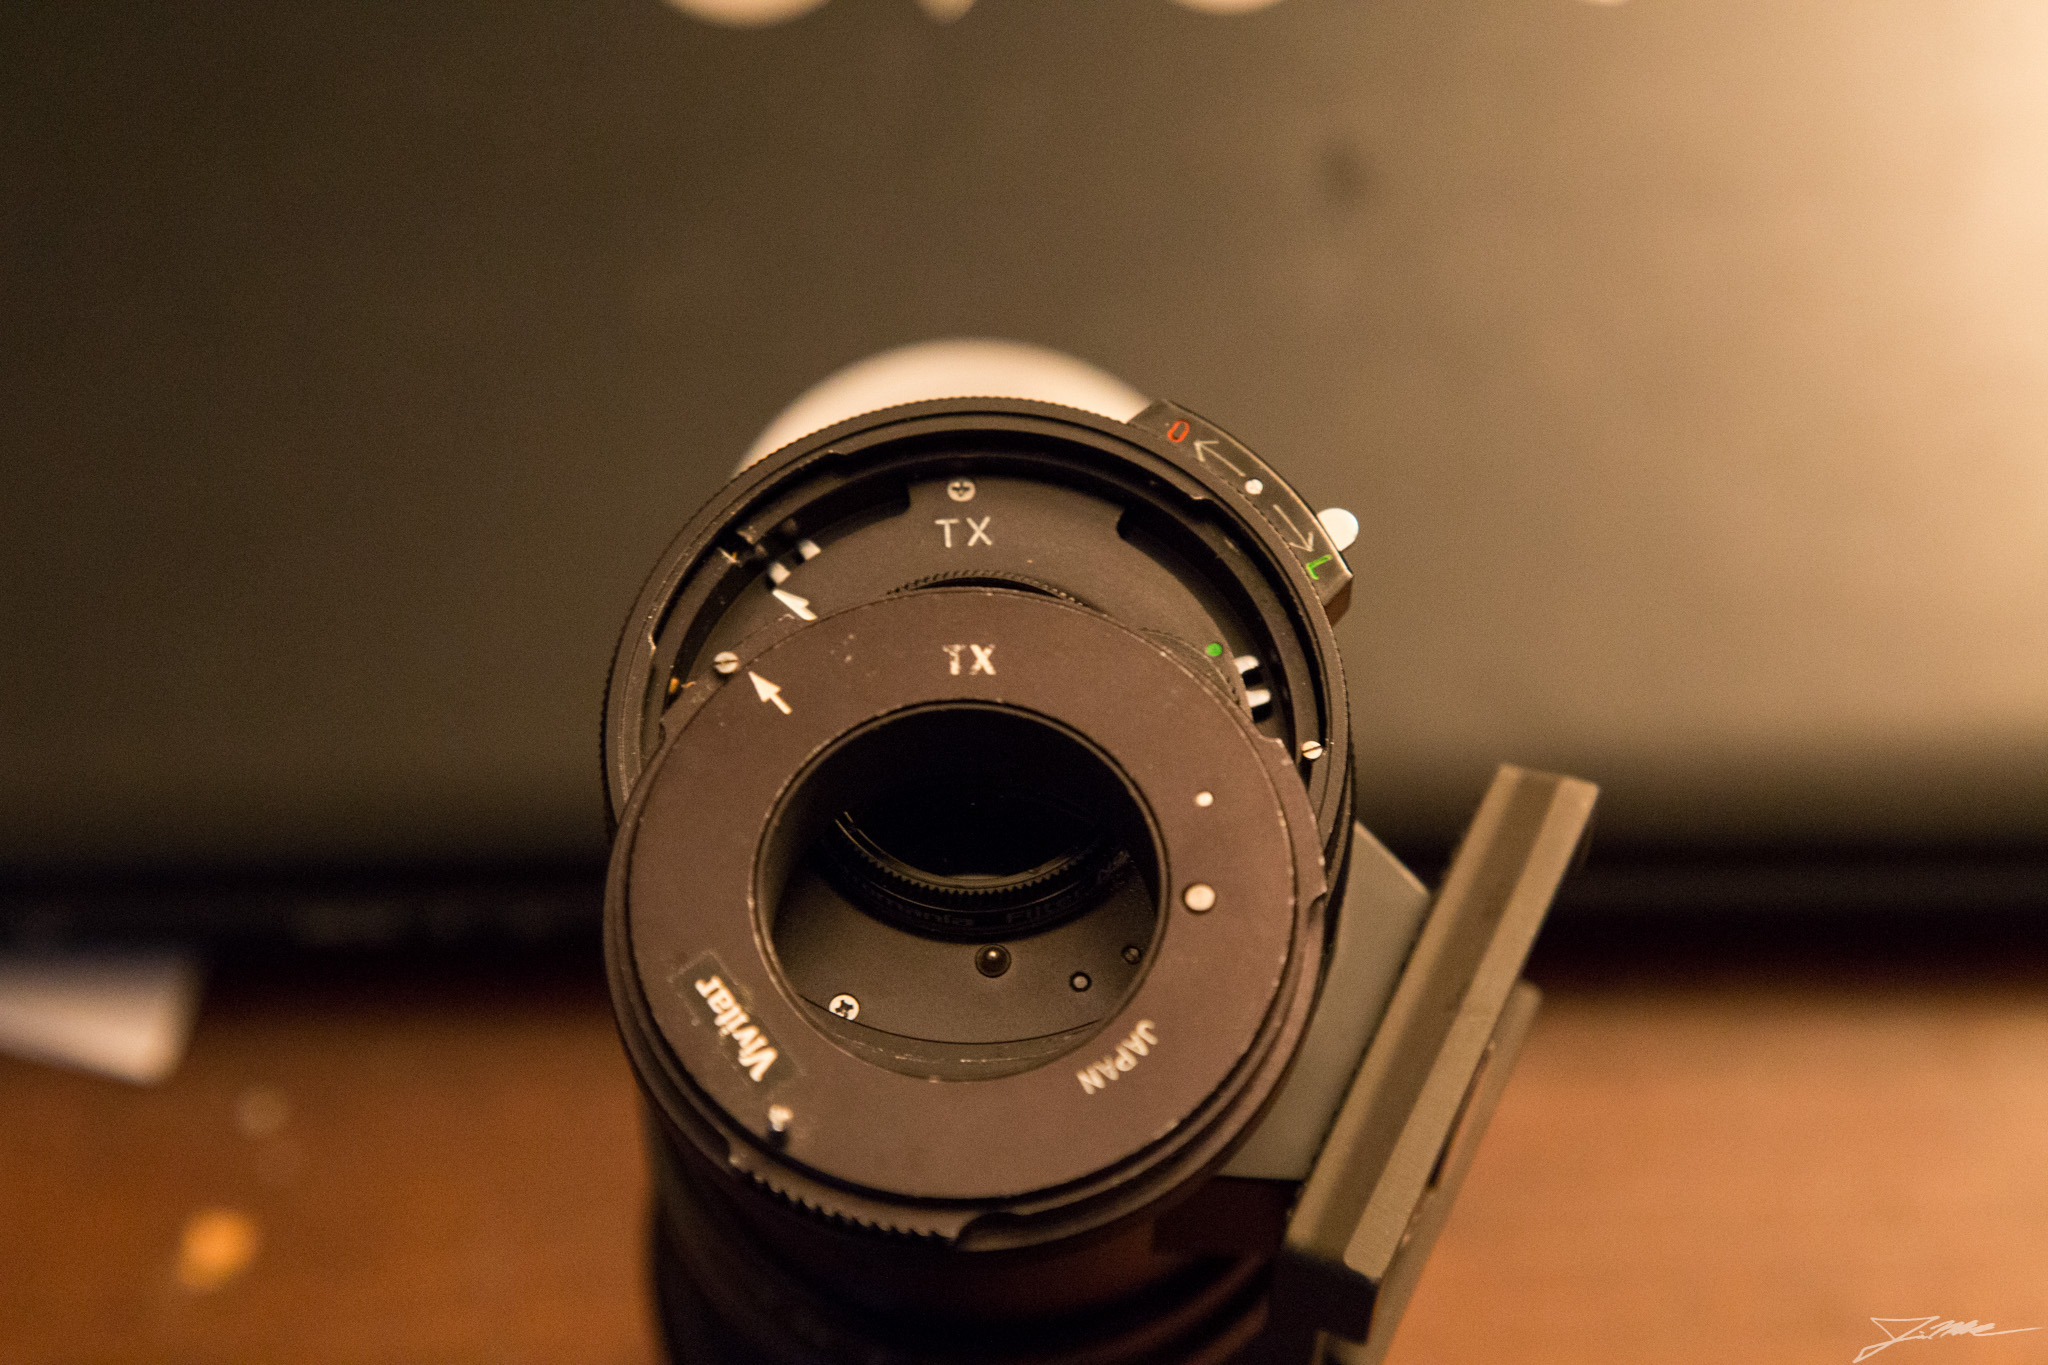
M42 to EF adapter and TX to M42 adapter:
Astromania #8 Yellow filter installed backward in lens body:
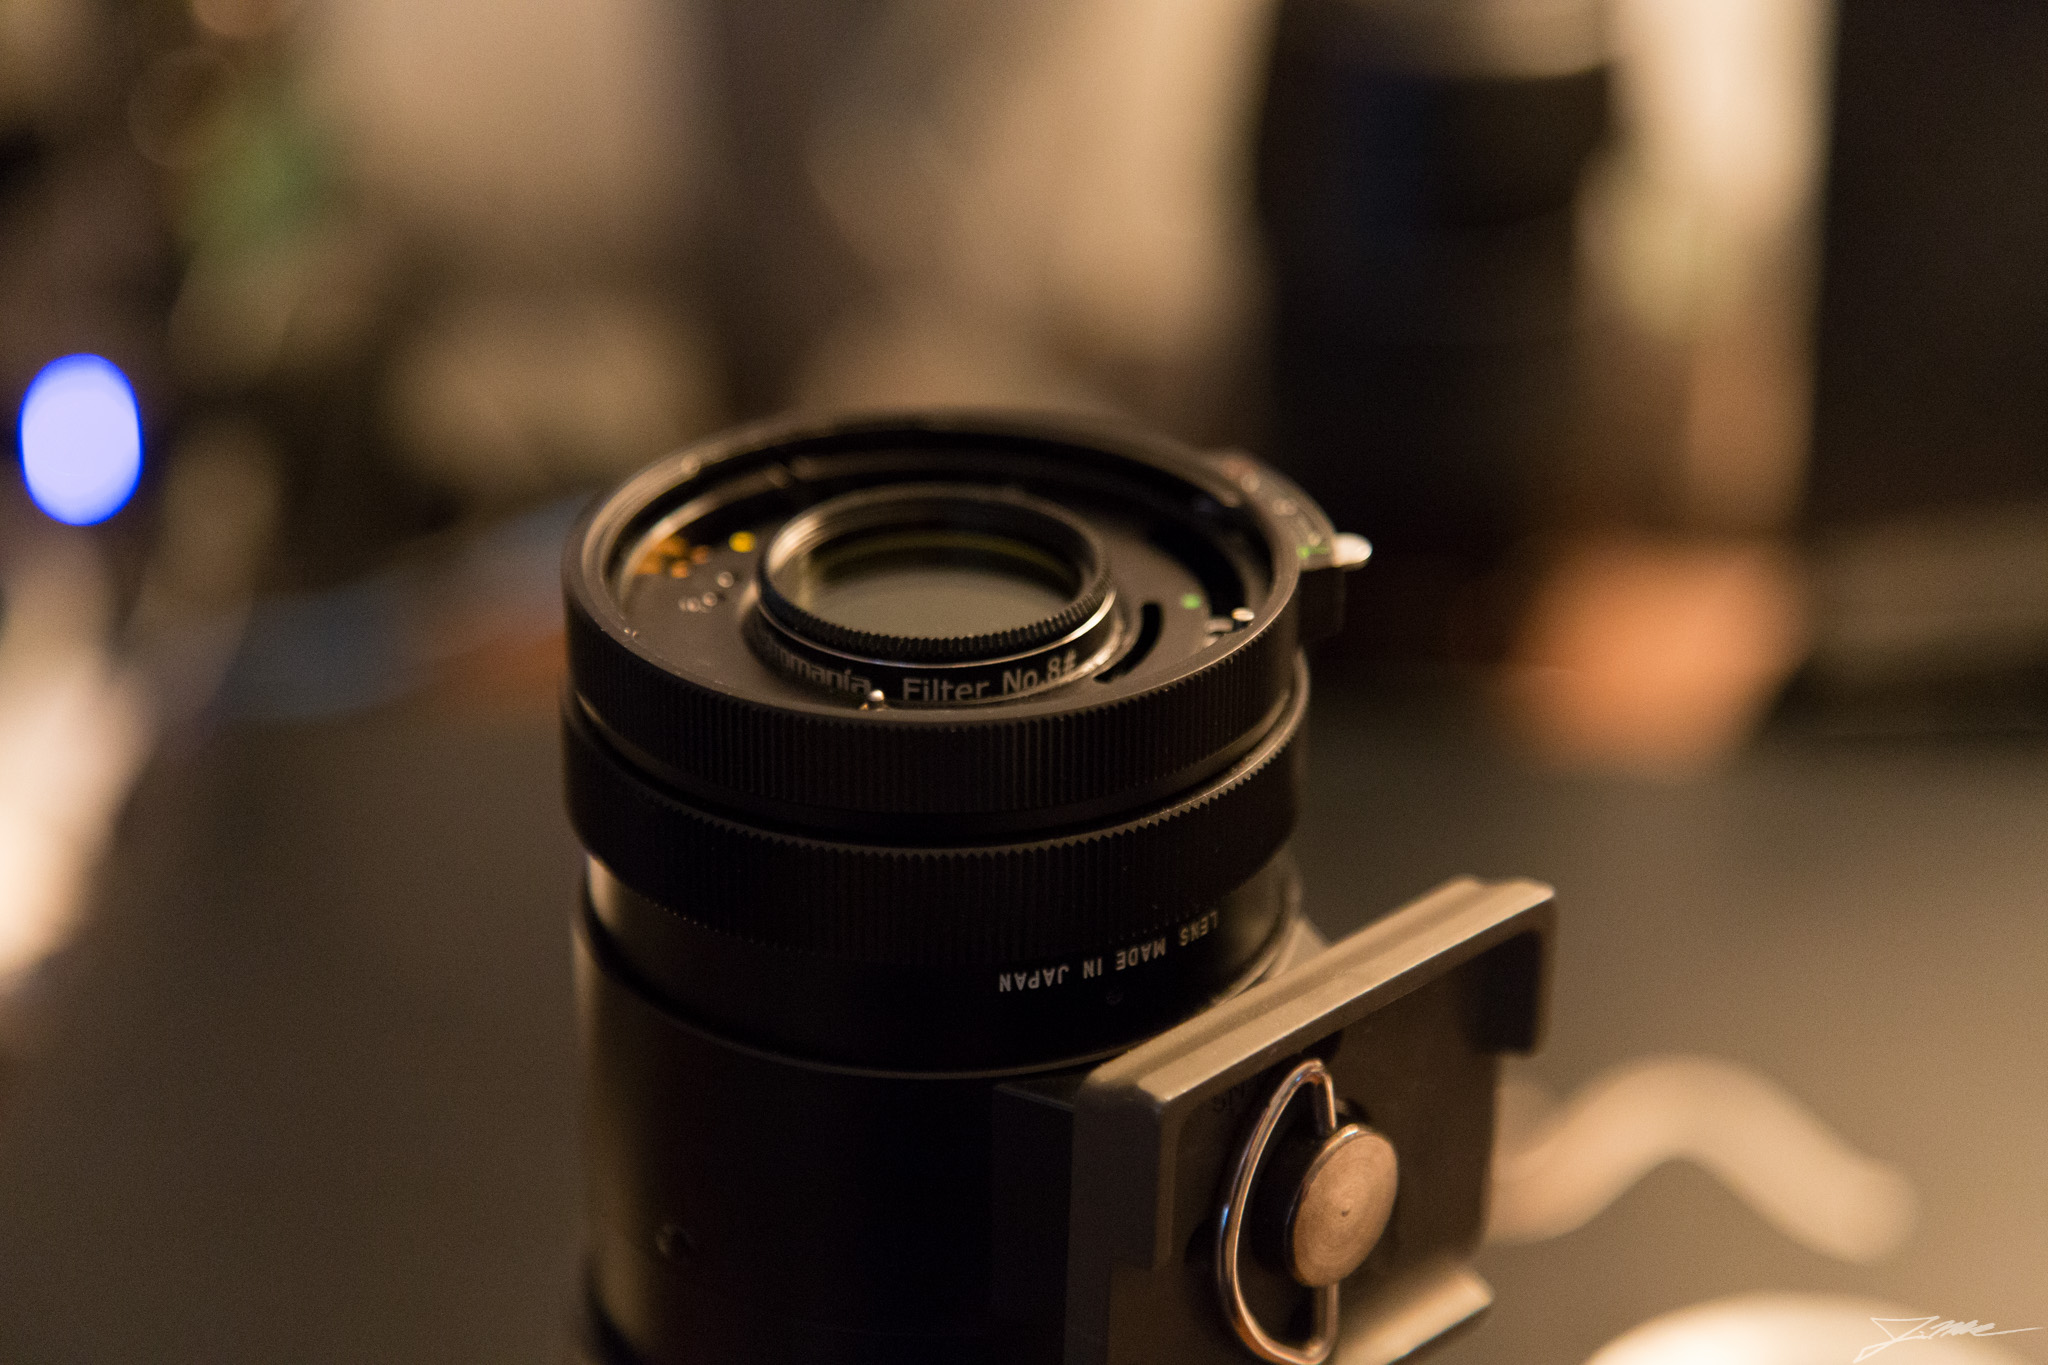
Lens all buttoned up and ready to go test:
With everything sorted last night, I took the camera and tripod out for some cursory testing. Focus does move past infinity when racked all the way to the stop, so I can dial it back to exactly where it needs to be and then shoot! Filter also killed the blue fringing, about which I am hugely excited.
The moon, with NO chromatic aberration correction applied:
4oomm, f/5.6, ISO 400, 1/500 sec.
With the EF adapter I have, it allows full manual control of the aperture ring as well, so I can do cool ‘starburst’ shots (though this is a planet…) by stopping the 8-bladed aperture down and getting diffraction spikes. Here’s a shot of Jupiter and all the Galilean moons, as well as two stars (last 2 dots to the lower left) which happened to line up nicely:
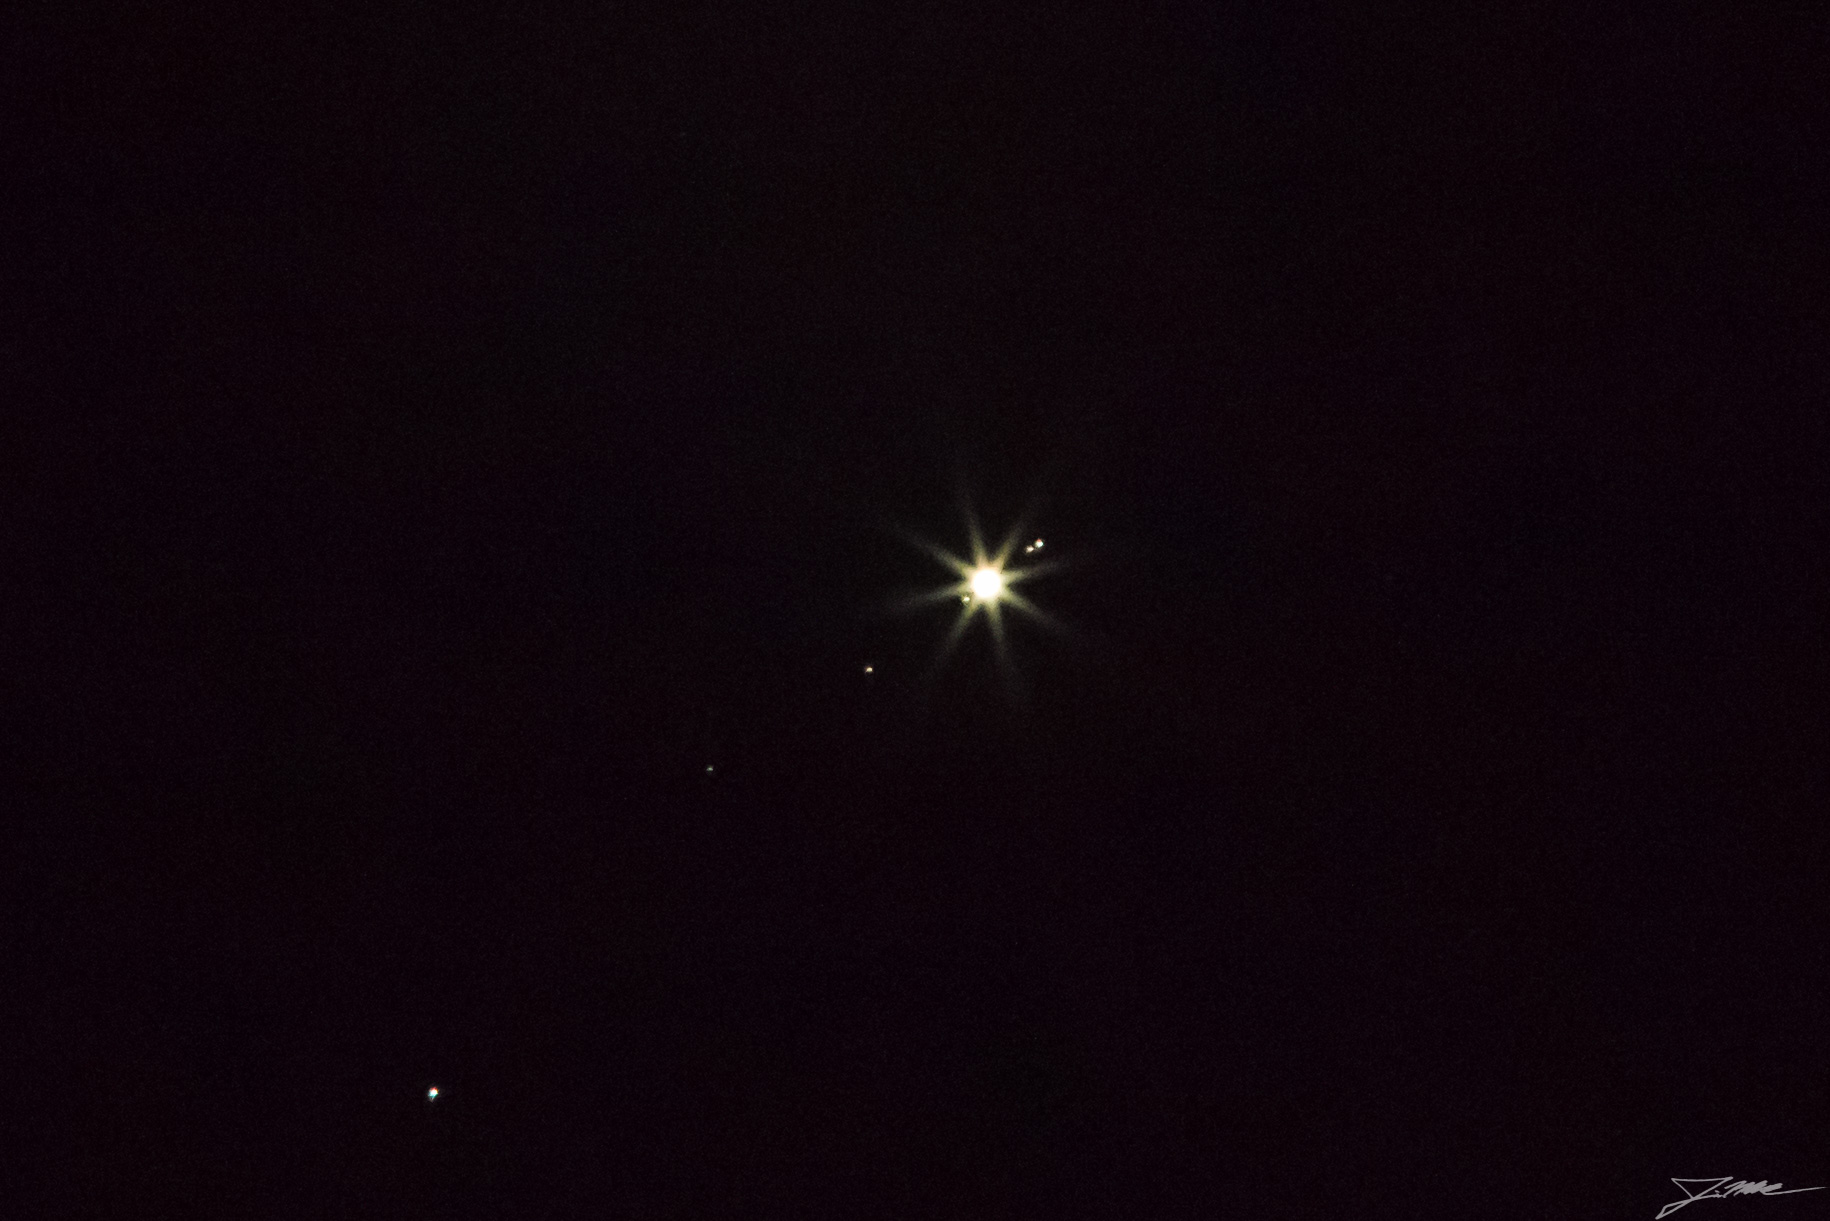
400mm, f/22, ISO 25,600, 1 sec.
Of course I realize that as soon as J.J. gets out of the NICU, the night-time adventures will shift starkly to those of a feed/change/re-swaddle/rock-to-sleep nature. But while I can, this little bit of stargazing is doing my brain a LOT of good. Back to the pictures from Quantico on the 15th/16th, I still have some ISO 1,600 film loaded in my EOS RebelX S film camera, so I thought I’d try a couple of shots with that. To properly set up the exposure and framing, I used ISO 1,600 settings on the dSLR, and then just used the same ones on the film camera. Or so I thought. I realized after I grabbed the film camera out of the bag that I hand’t brought the correct adapter for shooting long-exposures with the remote, so I was limited to 30-seconds timed in-camera. Oh well. We’ll see how that all turned out about 11 more frames from now when the roll runs out. For the time being, here’s the 2-minute shot I ended up with out of the 6D, after processing: