Seriously. You could. Unless you’re paying attention to what you’re doing, and have proper equipment, the activities described in this post could cost you your eyesight. CAVEAT LECTOR.
What is he rambling about, you ask? Solar photography. Pointing a telescope or camera lens at the stars gives one an appreciation for the hugeness of all that is out there in the universe. I can’t see a large number of stars from my front yard due to light pollution, but I can increase that number if I can manage to collect more light. With 50mm objective lenses, my binoculars offer about 25 times the light collection area of my pupils alone (average pupil diameter is ~5mm). The travel scope, with a 70mm objective, is nearly twice as effective, with 49x the surface area. Stepping up to the big scope, at 203mm, the NexStar is corralling over 400 times as much light as my mark-1 eyeballs, which means I should (theoretically) be able to observe objects 6.5 apparent magnitudes dimmer with the big scope than I can with my eyes alone. Pretty cool!
So, what, you ask, does this have to do with solar photography? Well if astrophotography is photography of astronomical objects, then that does indeed include our own local star, Sol. The issue with doing so, however, is that while our sun is a fairly middle-of-the-road star, it is VERY close, astronomically speaking. Which means the amount of light it puts out has much, much less distance over which to spread out and diminish. Compared to the brightest star in the night sky (Sirius, with an apparent magnitude of -1.46), the sun is 1.3 Billion (with a ‘B’) times brighter as observed from the only rock I’m currently able to stand on. So, at first glance, grabbing a half-trillion-fold increase in photons over night-time stars from our neighborhood nuclear furnace might seem a bit ‘off’.
Thus, the precautions:
First, never look directly at the sun. Even unaided, or with regular sunglasses, you can permanently damage your retinas by doing so. Since bright sunlight has the benefit of casting stark shadows, we can use this to our advantage in aligning the telescope (more on this later). However, before we do that, we need to somehow block almost all, but not quite all of the sun’s light. This way we can keep it from torching our eyeballs (literally), but still grab enough light to allow the camera to capture an image. Enter the solar filter. Solar film, really. Developed back when there was huge interest for the 1999 solar eclipse, this stuff cuts a huge percentage (advertised as 99.999%) of the light, which means if you place it in a holder and put said holder in front of your telescope, you can observe the sun safely. I got some of this wonderfilm as a Christmas present, and finally got around to putting the holder together over the weekend. Because of the shape of the film, I was able to squeeze out another filter for my Travel Scope, and put a layer on a spare 58mm UV filter, so I can now screw that on the front of 2 of my dSLR lenses to take pictures directly.
Next, we need a way to aim the scope, without being able to see anything through it other than the sun itself. Enter the Piggyback and finder scope setup. The NexStar 8 GPS is a great base from which to do astrophotography, but aiming it is similar to trying to find objects in the sky through a small soda straw. The field of view through the scope with my longest focal length eyepiece is only around 1.6°, so I need something to help me point it. The 70mm Travel Scope with the 40mm eyepiece covers a full 5°+ of sky, which is more helpful, but we still can’t do better than general pointing. The trick is to use the small 5×24 finderscope that is attached to the Travel Scope. Orient the big scope such that the shadow of the finder becomes circular (meaning it’s pointed more or less directly at the sun). As you do so, the sun will start shining through the lens and producing a bright spot within the shadow (when you hold your hand close to the back of the finder). Further move the big scope until this bright spot is centered in the shadow, which means the finder is pointing directly at the sun. DO NOT LOOK THROUGHT THE FINDERSCOPE. Now, as long as the finderscope is aligned correctly with the small scope, you should be able to see the sun somewhere in the field of view of the next larger scope. If that scope is also aligned correctly, once the sun is centered in the median scope, the big scope should have the sun somewhere in (or very near) the FOV.
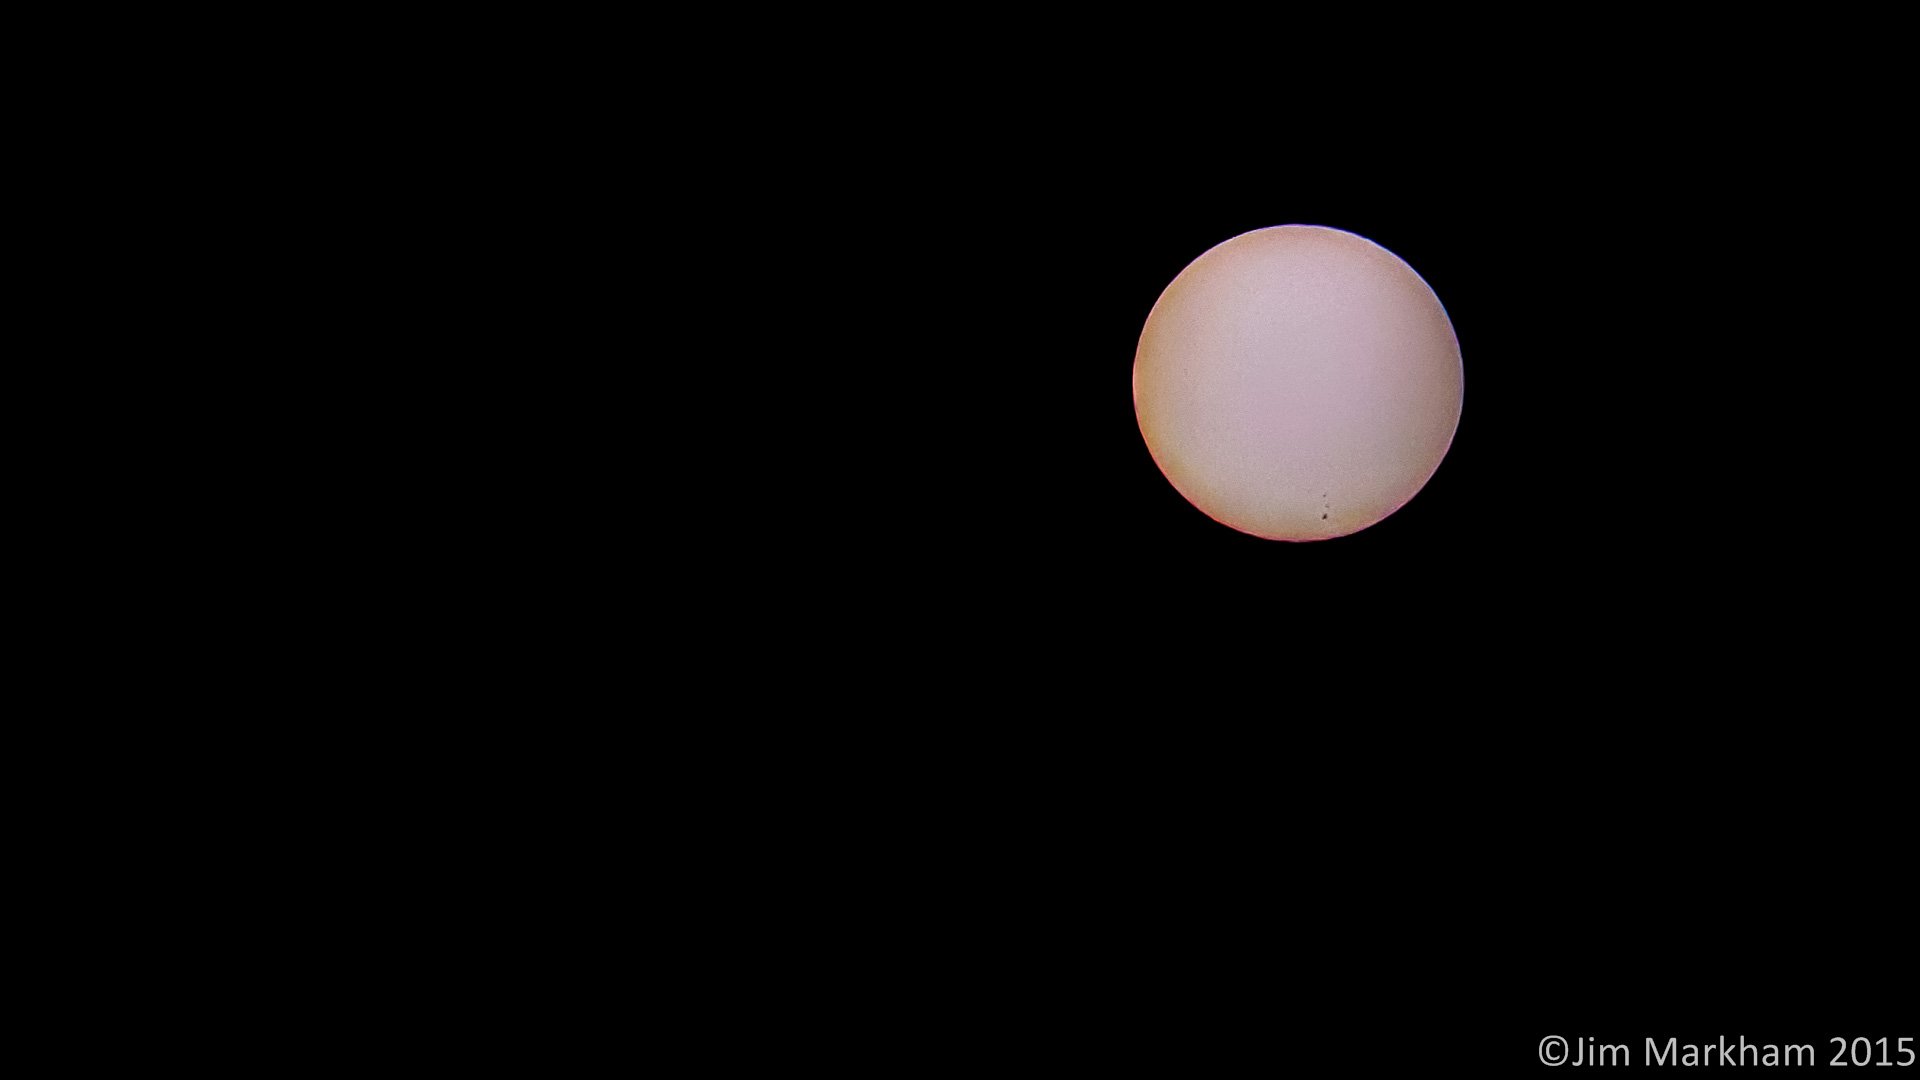
I had my dSLR attached to the big scope, so each time the sun came out from behind the clouds, I would check the shadow, check the Travel Scope, and then work the Sun back onto the camera sensor. Once I got the sun into the large scope, I ran an alignment, and used the moon as a proxy so the scope would track across the sky. While this was less than optimal, it didn’t require me to dig into the menus and figure out solar tracking, or to align the scope the night before and leave it out until the sun came up.Based on the free aperture of the filter holder being 160mm and the focal length with the reducer-corrector installed being 1280mm, this gave me a fixed focal ratio of f/8.0. With that ratio, I wanted to shoot with the ISO as low as possible, but found that the sharpest images were coming at ISO 200 and a shutter speed of 1/1250, vice ISO 100 and shutter speeds around 1/640. Might have had to do with vibration or somesuch, but in any case I was able to grab a string of 10 shots at that setting for stacking in Registax. Here’s what I ended up with:
Not bad for a first attempt, if I say so myself. I think I’d like to pick up a H-α filter and look at some of the surface features, but those things are a bit pricey, and thus not in my immediate stargazing budget. Also might try pulling the focal reducer and trying closer-in shots of the sunspots themselves. And unlike waiting for a a night where the atmosphere cooperates, there’s generally enough light as long as the sun isn’t behind the clouds for atmospheric seeing conditions to affect the level of ‘Sol-gazing’ I’m doing.
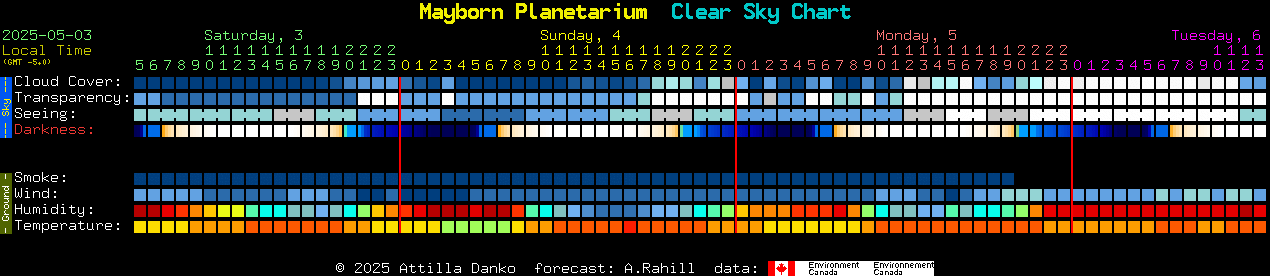
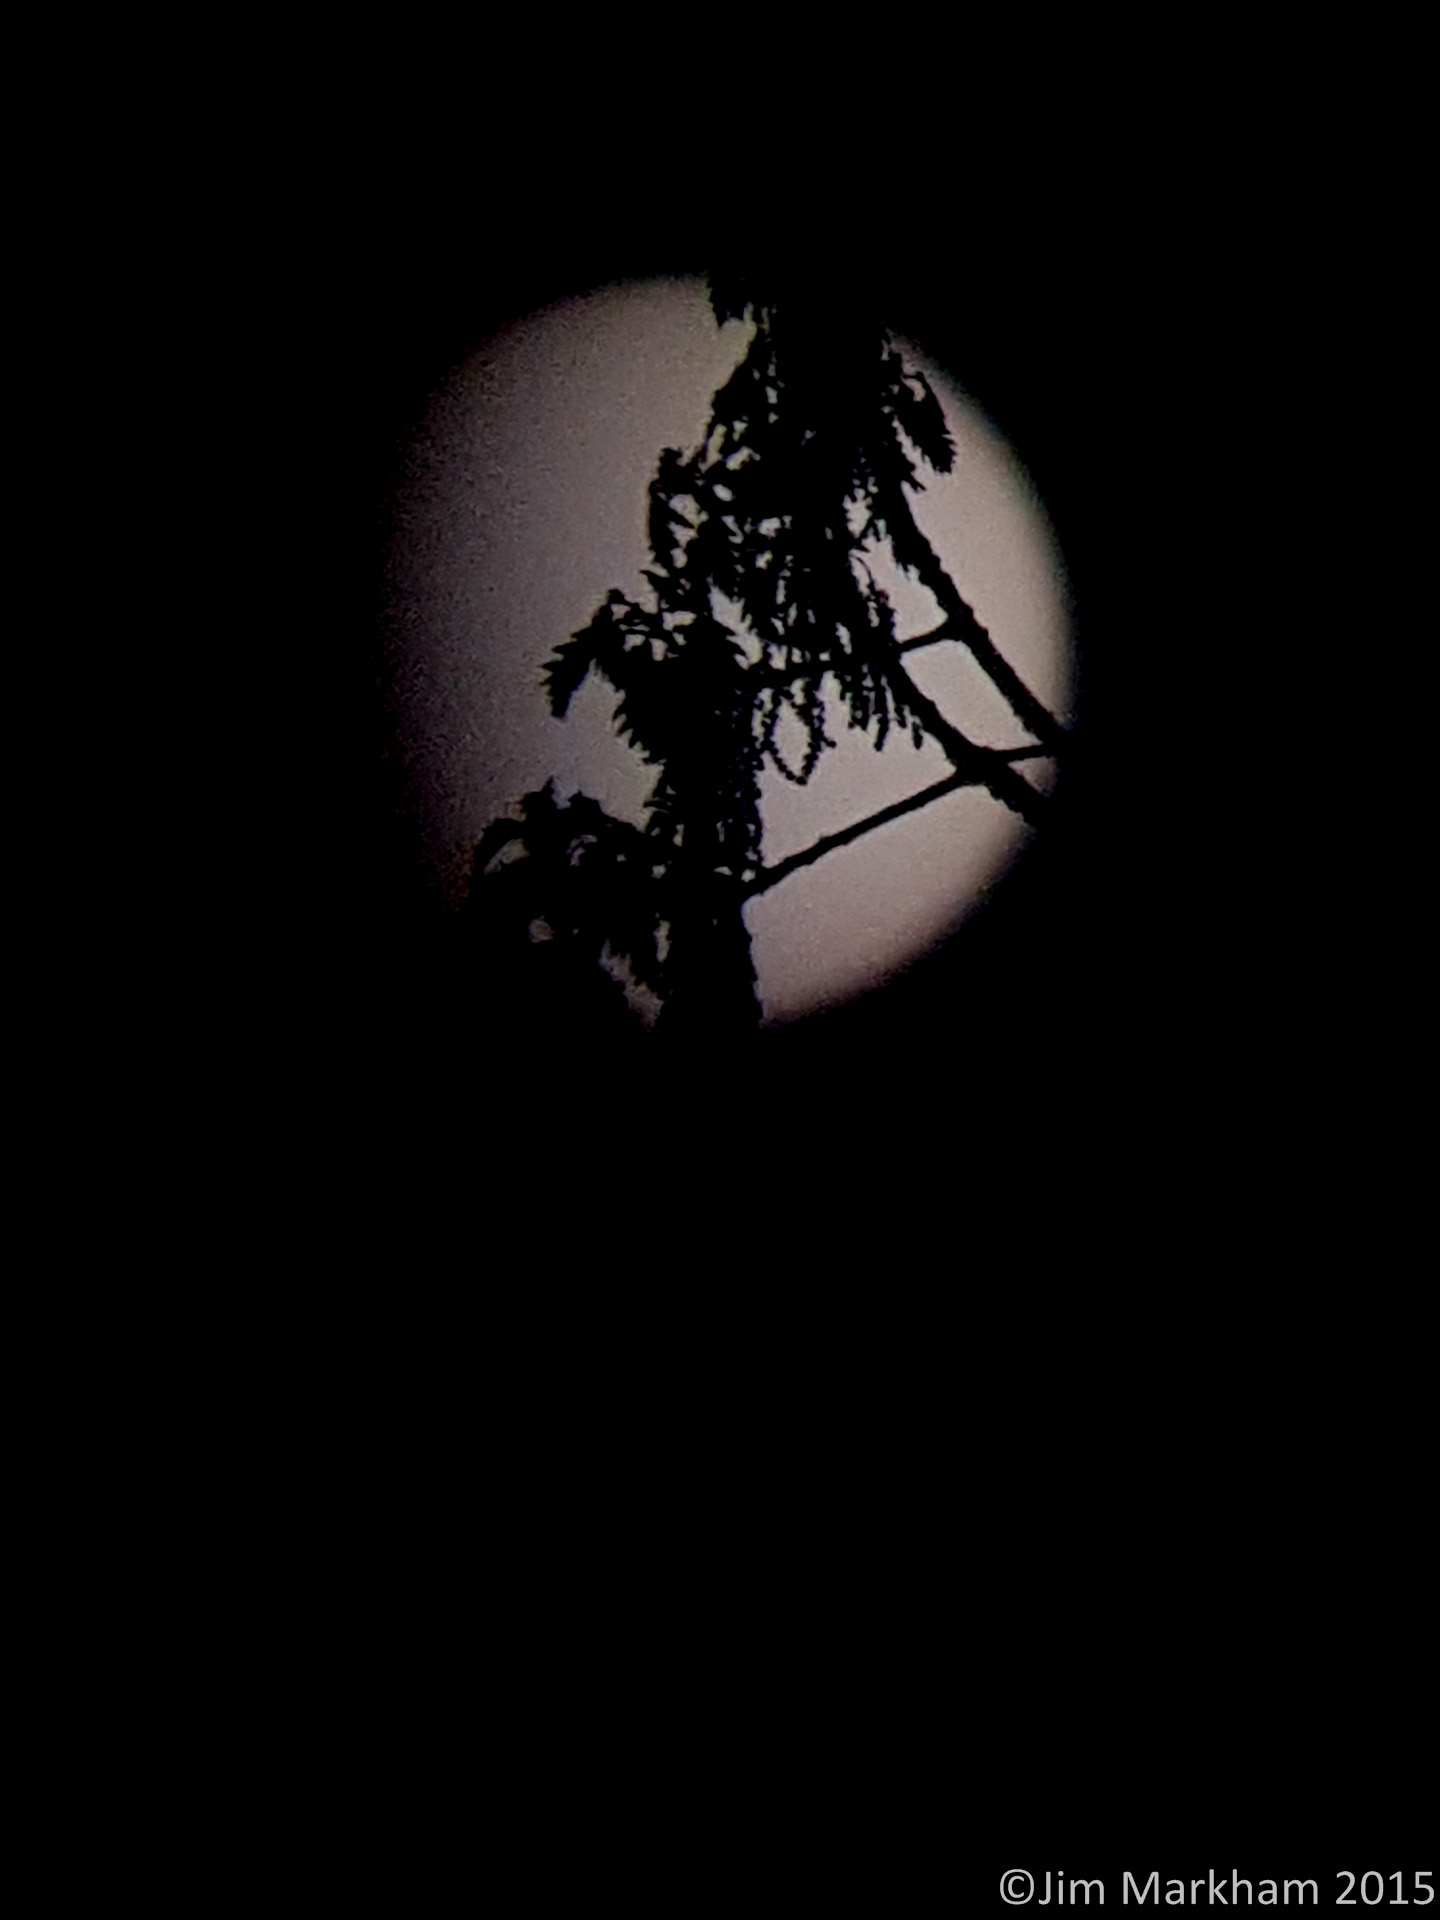
After getting the shots through the big scope, I thought I’d try using eyepiece projection to snap a shot with my cellphone on through the Travel Scope. The featured image for this post is what I ended up with, here it is with a link to a larger version:

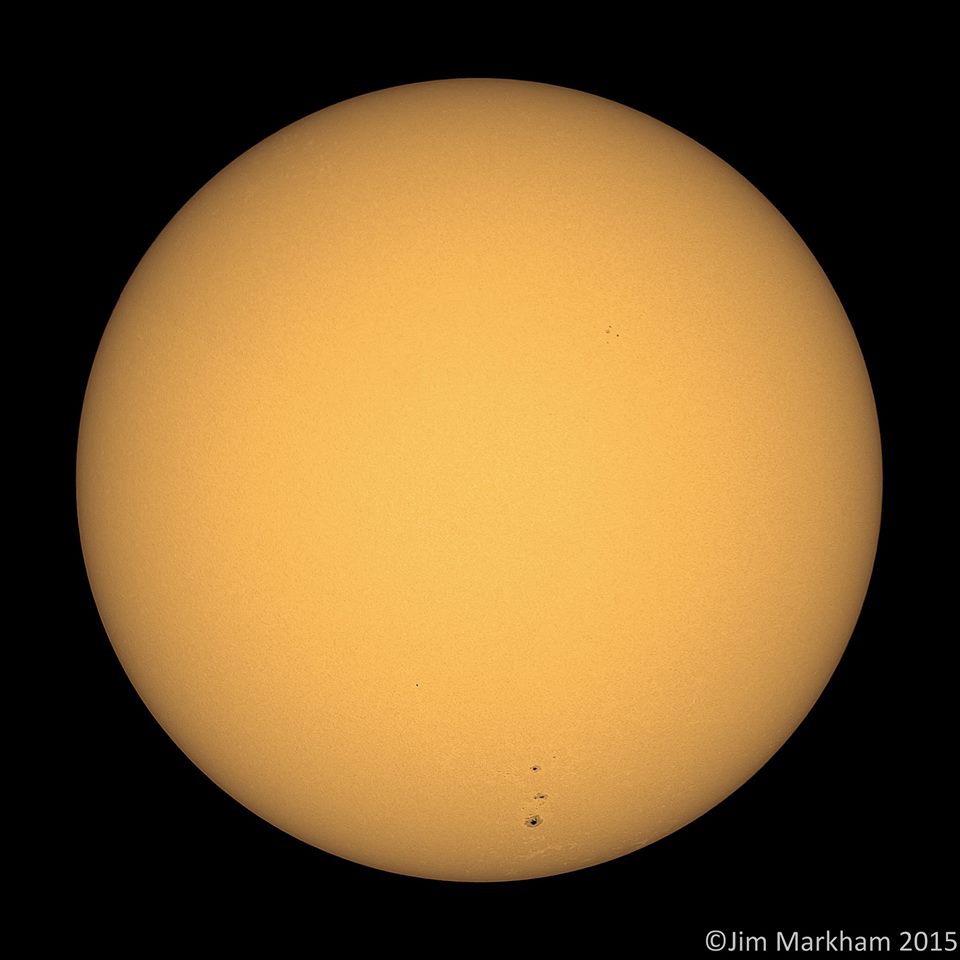
Even with a 400mm ‘beginner’ scope (albeit with a 10mm Plossl eyepiece that cost more than the scope itself) and a cellphone, one can snag some pretty good solar system shots. As an aside, since the sun is out more often now, the trees are blooming (Cherry blossom festival already happened):
And speaking of trees, once the sun gets to the edge thereof, the cellphone wouldn’t focus on the sun’s disk, but only on the shadows of the leaves in the foreground…
All in all, a pretty good afternoon’s worth of ‘time wasted’ pointing a telescope at the closest star. The next solar eclipse that will be visible from a large swath of the US will be in 2017, so I’ll definitely be prepared, and will likely travel to somewhere on the path of totality if not living there at that point. As I’ve said before in this post, DON’T LOOK DIRECTLY AT THE SUN WITHOUT APPROPRIATE PRECAUTIONS. And yes, that does justify the ‘all-caps internet shouty voice’.